
A toy chest can be more than storage. It can feel like a playful landing spot for every adventure.
With a few smart changes, your space can look calmer, work better, and spark creativity every day.
1. Color-Grouped Bins With Friendly Labels

Spread the toys out in soft piles by color, then tuck each group into a clear bin or fabric pocket. You’ll love how the chest looks tidy at a glance, with bright pieces creating a pleasant pattern.
Choose bins that slide in smoothly so kids can open the chest without wrestling everything back and forth. Keep labels simple and picture-based, so even younger kids can match what they see to what they need. When you rotate colors for a week, the chest stays fresh and kids feel like they’re getting something new.
2. Drawer Dividers for Small Parts and Sets

If your toy chest has lots of tiny pieces, add drawer-style dividers that separate sets like building blocks, cars, or art supplies. Visually, it feels like a neat organizer tray inside the larger chest, and nothing disappears into the deep dark.
Dividers prevent the usual “all-in-one pile” problem, so kids can find what they want in seconds. Measure the inside width before buying inserts, then aim for dividers that fit snugly without forcing the lid to close. For personalization, label each section with a theme picture, like a road for cars or a tree for animal figures.
To keep costs friendly, start with a few adjustable dividers and add more only when a new clutter hotspot appears. A current trend is using stackable insert systems that adapt as toys grow, so your chest can evolve without replacing everything.
3. Rotation Shelf That Keeps Favorites Visible

Set up a small front shelf or shallow tray so a handful of favorite toys stay right at eye level. The visual payoff is huge, because the most-used items look inviting instead of buried in the back.
Rotating toys reduces the “too many choices” mess, and it also helps kids focus on one game at a time. Try keeping only a themed mix on the top shelf while the rest rests in the deeper area. When it’s time to rotate, let kids help pick what comes forward, so the process feels fun instead of chores.
Look for lightweight dividers or stackable bins that can swap positions easily. This approach also fits today’s trend toward minimal toy overflow, which keeps spaces calm while still feeling playful.
4. Fabric Cubbies for Soft Toys and Cozy Themes

Use fabric cubby organizers or hanging cloth inserts to hold stuffed animals and plush friends. The chest will look warm and cuddly, and the toys won’t get crushed into a lumpy heap.
Soft dividers are gentle for delicate plush and easier for small hands to pull open. Choose breathable fabric so items don’t get musty, and keep one cubby for “snuggle only” toys for bedtime routines. Personalize by using patterns that match your room, like stars, woodland animals, or pastel stripes.
5. Clear-Lid Storage for “See and Choose” Play

Pick bins with clear lids so you can see what’s inside without rummaging. When you open the chest, it feels like a mini shop window for toys, which helps kids choose faster.
Clear containers reduce frustration and support independence, because kids can spot the exact toy they want. Use a small set of larger bins for broad groups, such as figures, vehicles, and craft supplies, so the system stays simple. For personalization, add small color stickers on the lid corners to match the room’s palette.
If you want cost savings, try clear bins for the top layer first and use opaque containers deeper inside. Many families are leaning toward “visibility-first” organizers this year, since they cut down on time spent searching.
6. Label Cards on the Inside Lid

Turn the inside of the toy chest lid into a guide by attaching label cards with pictures of the main toy groups. The scene looks organized and encouraging, like a friendly map for how the chest should work.
When kids know where things go, cleanup becomes faster and less stressful for everyone. Keep the cards at the child’s height and use removable adhesive so you can update them as toys change. Personalize the cards with a few family details, like your child’s favorite animal or a small “home base” graphic.
For budget-friendly options, print labels at home and laminate them with simple clear sheets. This keeps the lid useful and supports today’s trend of visual routines that make daily life easier.
7. Keep Artwork Supplies in a Separate Pocket Zone

Reserve one section of the chest for drawing, coloring, and craft extras so they don’t mix with action toys. You’ll notice a cleaner look right away, because paper, markers, and tape have their own tidy “station.”
Having a dedicated craft zone helps prevent broken crayons and scattered supplies, and it makes art time feel ready-to-go. Try using a small pencil pouch plus a roll-up organizer for markers, then place them in a snug bin inside the chest. To personalize, add a tiny prompt card like “Create something silly” so kids feel invited to start.
If you want to manage costs, start with the tools you already own and only add organizers where clutter is worst. Many parents are choosing “purpose pockets” now, because they keep creative supplies from turning into a mess.
8. Tiered Insert Organizer for Easy Reach

Install a tiered insert so toys have layers instead of one deep pile. The chest becomes easier to scan, and kids can reach forward items without dumping everything out.
This structure improves independence and reduces the “everything falls when I grab one thing” chaos. Look for tiers with rounded edges so hands don’t snag, and measure the height so the lid still closes comfortably. For personalization, rotate the top tier with seasonal themes like ocean animals or space heroes.
9. Use a “Return Path” for Cleanup Flow

Create a simple cleanup path by placing matching bins along the direction kids naturally move while playing. The visual effect feels like a little track of order, and toys seem to “go home” with less effort.
Cleanup gets easier when the return spots are obvious and close, so kids spend more time playing than picking. Try placing the most-used bins at the front and the less-used ones toward the back or deeper side. Add a gentle reminder card with a fun picture, like a smiling character doing the tidy-up dance.
To keep costs low, you can use shoe organizers, small baskets, or repurposed containers before buying anything new. This idea matches the current trend of setting up kid-friendly zones that reduce friction in daily routines.
10. Vintage-Look Baskets for a Warm, Stylish Chest
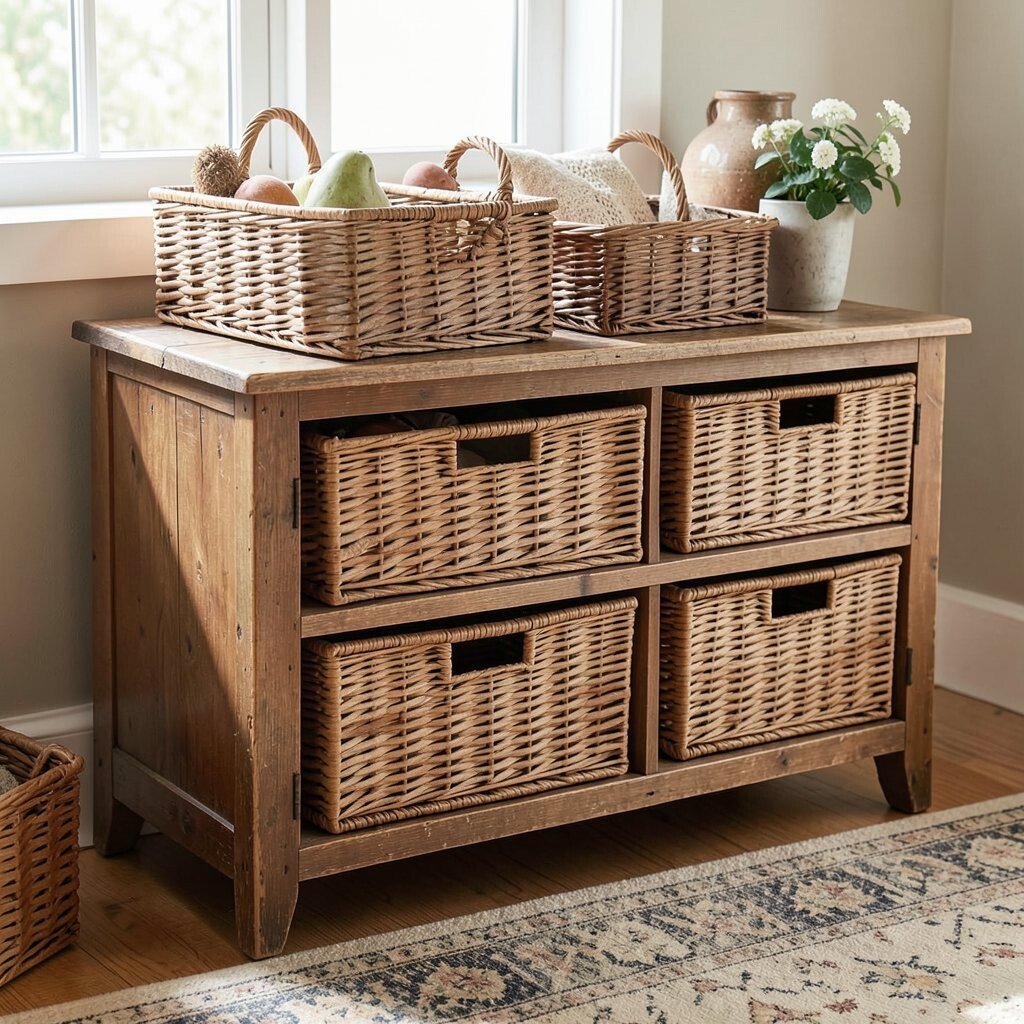
Swap plastic tubs for baskets with a cozy, vintage feel, like woven seagrass style or sturdy fabric baskets. The chest instantly looks more like home decor, and toys feel curated instead of tossed.
Baskets help with airflow and can make the space feel lighter and less bulky. Choose baskets that are uniform in size so stacking inside the chest looks neat and balanced. Personalize the look by tying a small ribbon to a handle or adding a stitched tag with a child’s name.
11. Soft-Top Toy Bags for Quick Daily Picks

Keep a soft-top toy bag inside the chest to grab and carry favorites during play. You’ll love how the bag makes the chest feel like a play station, not just storage, because toys can travel from room to room easily.
This setup saves time when you do a quick tidy, and it also encourages kids to help without lifting heavy bins. Look for bags with wide openings and sturdy stitching so pieces don’t spill out. For personalization, choose a pattern your child loves, like dinosaurs, rainbows, or ocean waves, so the bag feels like part of the game.
If you’re thinking about cost, start with one bag for the most common toy group, like vehicles, and expand later. Current trends favor flexible organizers that make cleanup mobile, especially for families with active routines.
12. “Story Time” Section With Book Holders

Add a dedicated space for board books and picture books so story time feels effortless. Visually, a book holder makes the chest look calmer, and the covers create a colorful mini display.
When books live in their own spot, they’re easier to grab and less likely to get buried under building sets. Use a slim book rack insert or a standing holder so covers stay visible without bending. Personalize by letting kids choose a rotating book of the week and place it on top for easy access.
To manage costs, you can repurpose a magazine holder or a small shelf you already have and place it inside the chest. Many homes are moving toward “reading-first” toy systems, since it supports quiet play and calmer evenings.
13. Size-Based Packing for Clutter Control

Sort toys by size, then create separate zones for small, medium, and large items. The chest looks more organized because each area has consistent volume, and there’s less chaos from mixed sizes.
This approach protects smaller toys from getting crushed and makes searching easier. Try keeping small items in lidded containers, medium toys in open bins, and larger items angled so they sit neatly. Personalize the layout by matching bins to categories your child uses, like “tiny treasures” or “big heroes.”
14. Puzzle and Game Organizer With a Separate Cabinet-Style Tray

Store puzzles and board games in a flat tray insert so pieces don’t scatter all over the chest. The visual difference is clear when you open the lid and see tidy stacks instead of mixed pieces.
A dedicated game tray helps families keep track of sets, which means fewer “where is the missing piece” moments. Use dividers inside the tray for puzzle boxes, game cards, and small token containers. For personalization, label the top tray with a favorite theme, like superheroes or farm animals, so game time feels special.
For cost considerations, look for an affordable drawer organizer or shoebox-size tray that fits your chest dimensions. This matches a common trend of setting up “set preservation” systems to protect game collections from getting lost.
15. Seasonal Rotation With a Home-Front Staging Bin

Set up one staging bin for seasonal toys, like holiday décor, beach play items, or winter crafts. The chest looks lively throughout the year, and kids feel like their play world changes with the calendar.
Seasonal rotation keeps the chest from becoming overwhelming and helps you tidy without getting rid of anything. Choose a bin that’s easy to lift and place near the chest, then store off-season items in a closet or under-bed storage. Personalize by adding simple season stickers or a fabric tag so kids can tell what’s “in season” right now.
If you want to keep costs low, use what you already have and focus on making the staging bin the easiest one to access. A current trend is rotating play props to refresh creativity while reducing clutter pressure in busy homes.
16. Create a “Toy Museum” With Display-First Thinking

Design a small display corner within the toy chest by keeping a few standout items facing outward. The chest becomes a mini toy museum, and kids enjoy seeing their best pieces highlighted instead of hidden.
This approach boosts pride and motivation, because children are more likely to care for items that feel special. Use stands, small risers, or shallow trays so display pieces stay stable and don’t topple into the rest. Personalize by letting your child choose what gets displayed, then swap items weekly so the museum always feels alive.
Cost considerations are simple here, since you can use inexpensive risers and repurposed containers rather than buying brand-new furniture. This idea also fits a popular trend toward playful, styled storage that makes everyday spaces feel joyful.