6+ Homemade Kitchen Aid Mixer Attachment Organizer Recipes to Simplify Your Baking Adventures!
Imagine a world where your baking tools are neatly organized, making every culinary creation easier and more enjoyable. It’s time to transform your kitchen chaos into a harmonious baking haven with some clever homemade organizers. Get ready to explore three creative ways to keep your Kitchen Aid mixer attachments in check and ready for action!
Picture this: a sleek magnetic strip that holds all your mixer attachments in one place, ready to grab whenever inspiration strikes. This simple yet effective organizer keeps your attachments visible and accessible, so you won’t have to dig through drawers ever again. Plus, it’s an eye-catching addition to your kitchen décor!
Wooden board or plywood
Strong magnets
Super glue
Paint or wood stain (optional)
Drill (for mounting)
Sandpaper
What makes this magnetic holder special is its blend of functionality and style. You can customize the board with colors or stains to match your kitchen theme, making it a delightful focal point. It’s also an eco-friendly option since it reduces clutter and keeps everything organized, allowing you to focus on what really matters—creating delicious treats!
Rating: 5. Ingredients: 2 h 15 min Total Time: 2 h 15 min.
Links open in new window. Source: Google.com
Do you love the idea of vertical storage? A hanging organizer rack can be your best friend! This clever design uses minimal space while maximizing storage, letting your mixer attachments hang freely like works of art waiting to be used.
Wooden dowels or a wire rack
Hooks (S-hooks work great)
Strong adhesive or screws
Paint or wood finish (optional)
Measuring tape
Drill or screwdriver
This hanging organizer is popular because it keeps your attachments off the countertops and makes it easy to see exactly what you have. It’s perfect for those who don’t want to sacrifice counter space for organization. Plus, you can easily rearrange or add to it as your baking collection grows, making it a flexible solution for any keen baker!
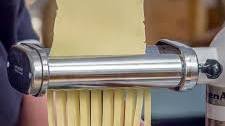
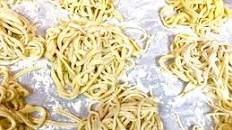
Rating: 5. Ingredients: Dough, eggs Total Time: 1 hr 5 min.
Links open in new window. Source: Google.com
If you’re more of a “hidden storage” kind of person, a drawer divider system might be just what you need. This method allows you to keep your mixer attachments neatly tucked away but still organized. No more rummaging around in a drawer trying to find that elusive whisk attachment!
Wooden dividers or plastic dividers
Measuring tape
Wood glue (if using wooden dividers)
Utility knife (for cutting dividers to size)
Pencil (for marking measurements)
Drawer liner (optional)
The beauty of a drawer divider system lies in its simplicity and effectiveness. You can create separate compartments for each attachment, making it easy to grab what you need without making a mess. This system is especially favored by bakers who enjoy a clean workspace, allowing creativity to flow without distractions!