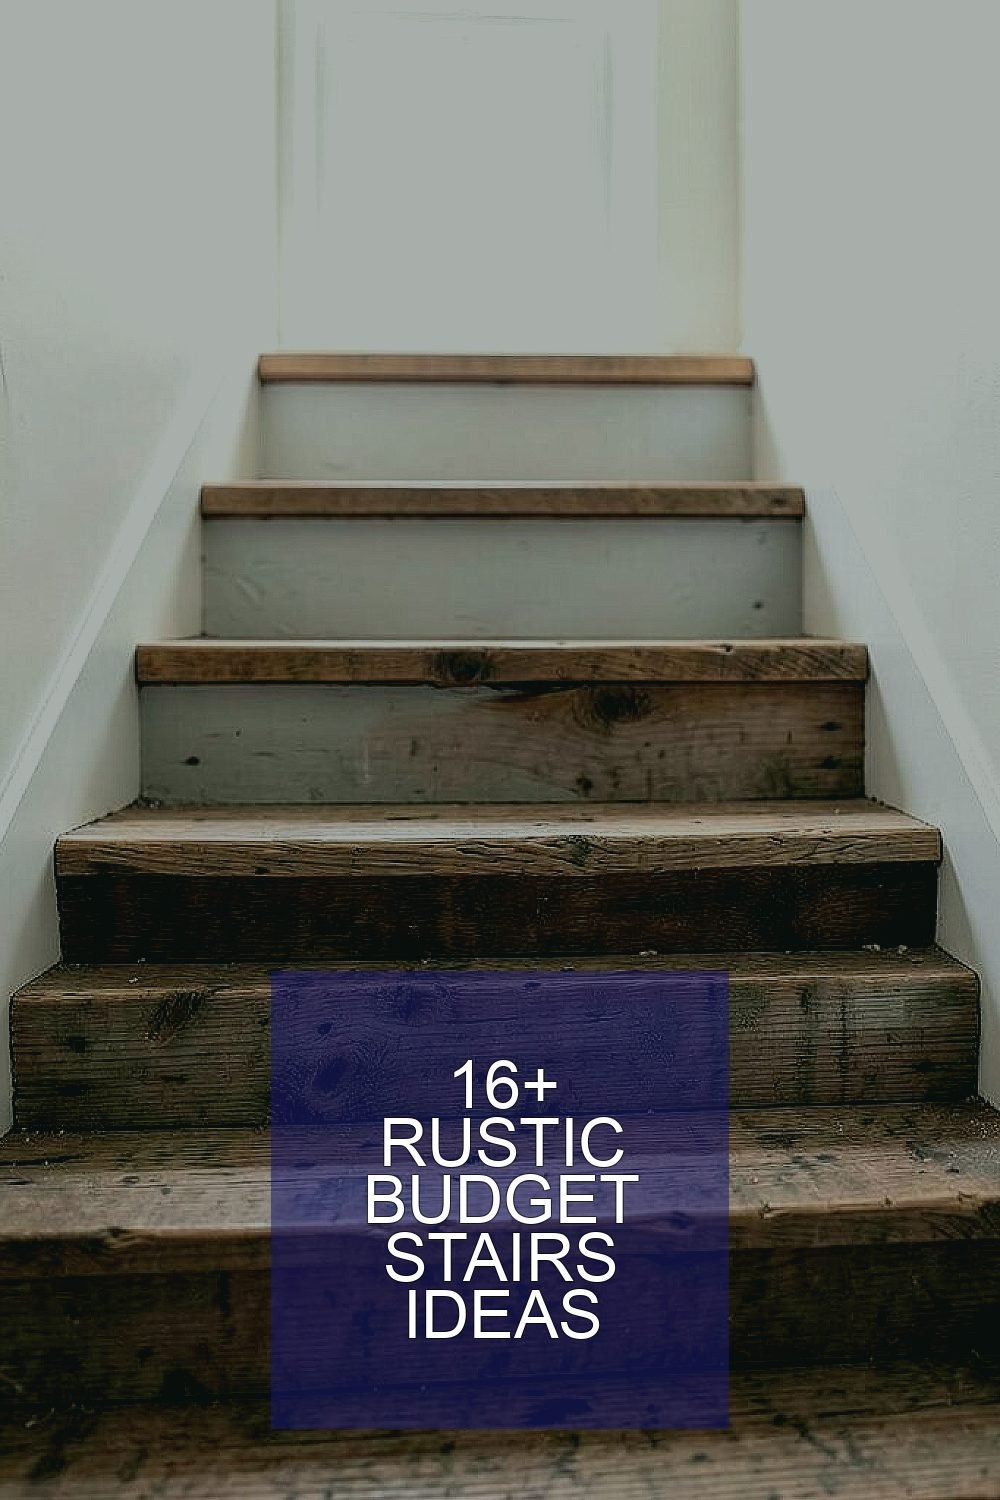
Rustic stairs can look full of charm without eating your budget. With a few smart choices, you can make every step feel warm and personal.
1. Reclaimed Wood Treads With Simple Risers

Using reclaimed wood for the treads gives your staircase instant character. You can often find boards from old pallets, barns, or flooring scraps that still look sturdy. The uneven grain and gentle color variation make each step feel handcrafted, even when you keep the build straightforward. Pair the wood with plain risers in a matching stain or a soft paint for a clean, balanced look.
Budget friendly reclaimed wood works well because it saves you from buying new planks. Sand the treads until they feel smooth, then seal with a matte finish so the texture stays natural. If your steps are uneven, choose wood thickness that helps you level everything before install. For personalization, mix two wood tones by alternating boards along the run, so the pattern looks intentional.
2. Stained Pine Steps With Chalky White Paint

Stained pine steps can look cozy and rustic while staying easy to source. Finish the wood with a warm stain that shows the knots, then paint the risers in chalky white for contrast. This combo makes the staircase brighter without losing that lived-in feel. It also highlights the shape of each tread, which is great for narrow stairways.
Choose low cost pine from home centers and plan on a clear seal to protect against scuffs. For a current trend, keep the white slightly imperfect, like a matte workshop paint, rather than glossy. Add traction strips or a thin anti-slip coating so the surface stays practical. If you want a personal touch, add a subtle glaze wash in a light gray to soften the edges between wood and paint.
To keep costs controlled, use a single stain product across all treads, even if you have minor color differences. Pre-finish boards before cutting when you can, so you spend less time touching up corners. Measure each tread carefully because small gaps can make the staircase look less crisp. With a steady hand and a simple finish plan, the final look feels both rustic and fresh.
3. Wraparound Bannister Paint In A Dark Worn Finish

A staircase feels more rustic when the handrail looks intentional. Paint the bannister a deep brown or charcoal and lightly distress the edges for a worn, old-world vibe. The dark finish frames the steps and makes the wood tones stand out. Even on a modest staircase, this small change gives the whole area a stronger style.
Use a durable primer and a top coat made for wood or metal, then let it cure fully before you handle it. To keep things budget friendly, buy small sample pots of stain or test paints until you find the exact depth you like. Distress gently with sandpaper at corners where hands naturally rub. For personalization, add a thin line of lighter color near the spindle base to mimic traditional trim work.
If your bannister is already stained, you can often refresh it with sanding and a new top coat rather than stripping everything. That saves time and avoids extra materials. Keep the look consistent with the rest of the home by matching the undertone to your floor or wall color. You’ll end up with a rustic focal point without paying for expensive custom woodwork.
4. Cork Under-Tread Pads For Quiet, Cozy Steps
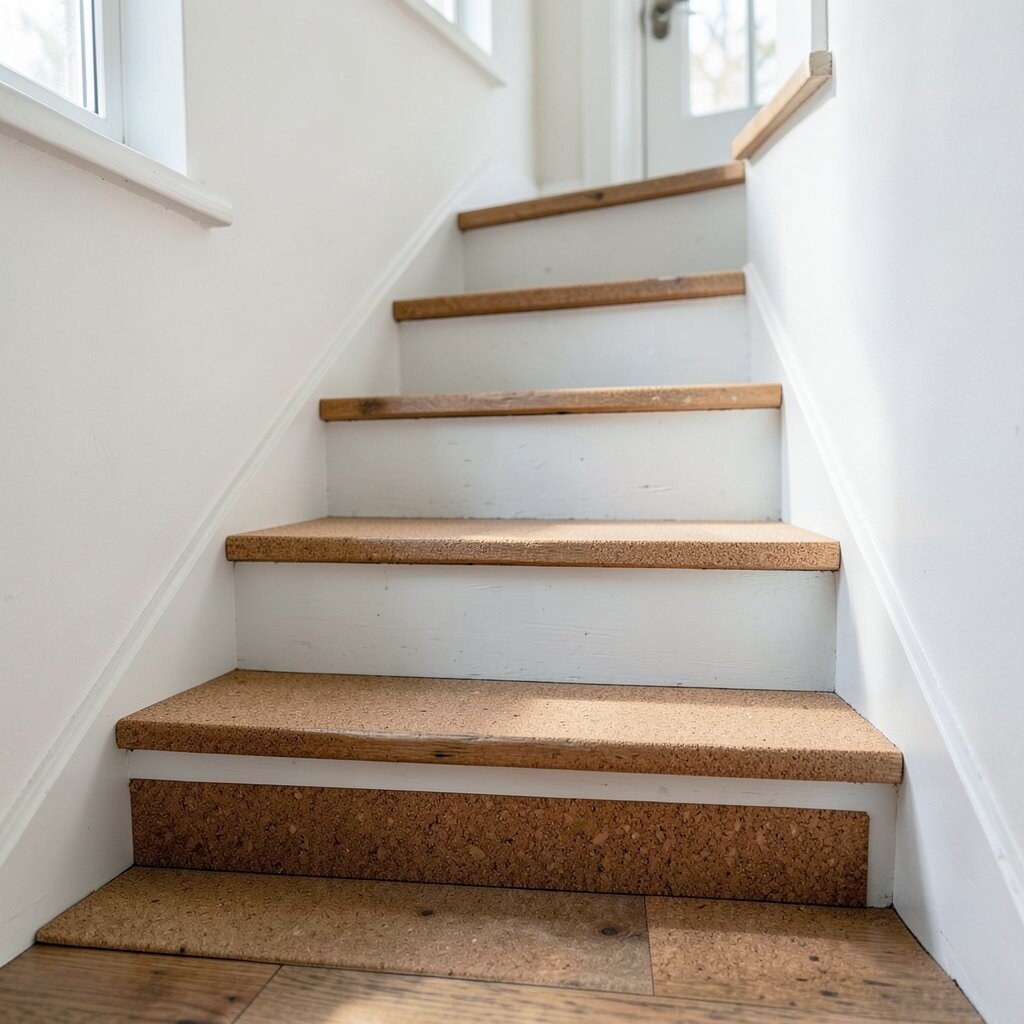
If your staircase feels loud or hard underfoot, cork under-tread pads are a smart rustic budget move. Cork brings warm texture and helps dampen noise, so the stairs feel calmer in the morning. It also protects your treads from wear, which can extend the life of cheaper wood surfaces. You can keep the visual rustic style by choosing cork tones that look natural and earthy.
Cut pads to size and test fit each tread before sticking or placing them. Use adhesive designed for flooring so it holds but can still be removed cleanly if needed. This approach works especially well when you have rented space or want flexibility later. For a personal touch, choose pad edges with a slight bevel so they look intentional rather than temporary.
5. Patterned Runner In Neutral Jute-Like Fabric

A stair runner adds instant comfort and safety, and a rustic runner can be surprisingly affordable. Look for jute-like or woven neutral fabrics with a tight pattern that feels grounded. The runner keeps footsteps quieter and reduces the need to refinish every surface. When you choose a neutral palette, the staircase feels timeless and easy to style.
Measure the run carefully and plan for secure tacks or non-slip backing so it stays flat. Choose a runner width that leaves a consistent amount of tread showing on each side for a tidy look. For personalization, go with a slightly lighter center stripe so light catches your steps as you move. If you have pets, consider a fabric with a tighter weave so it resists snagging.
Trends right now lean toward natural fibers and understated patterns, so you’ll look current without chasing every new style. You can also swap runners seasonally if you like, which lets you change the mood cheaply. Keep a simple maintenance routine by vacuuming gently and blotting spills quickly. A well-chosen runner can make even basic stairs feel custom.
6. Charcoal Wash On Existing Treads
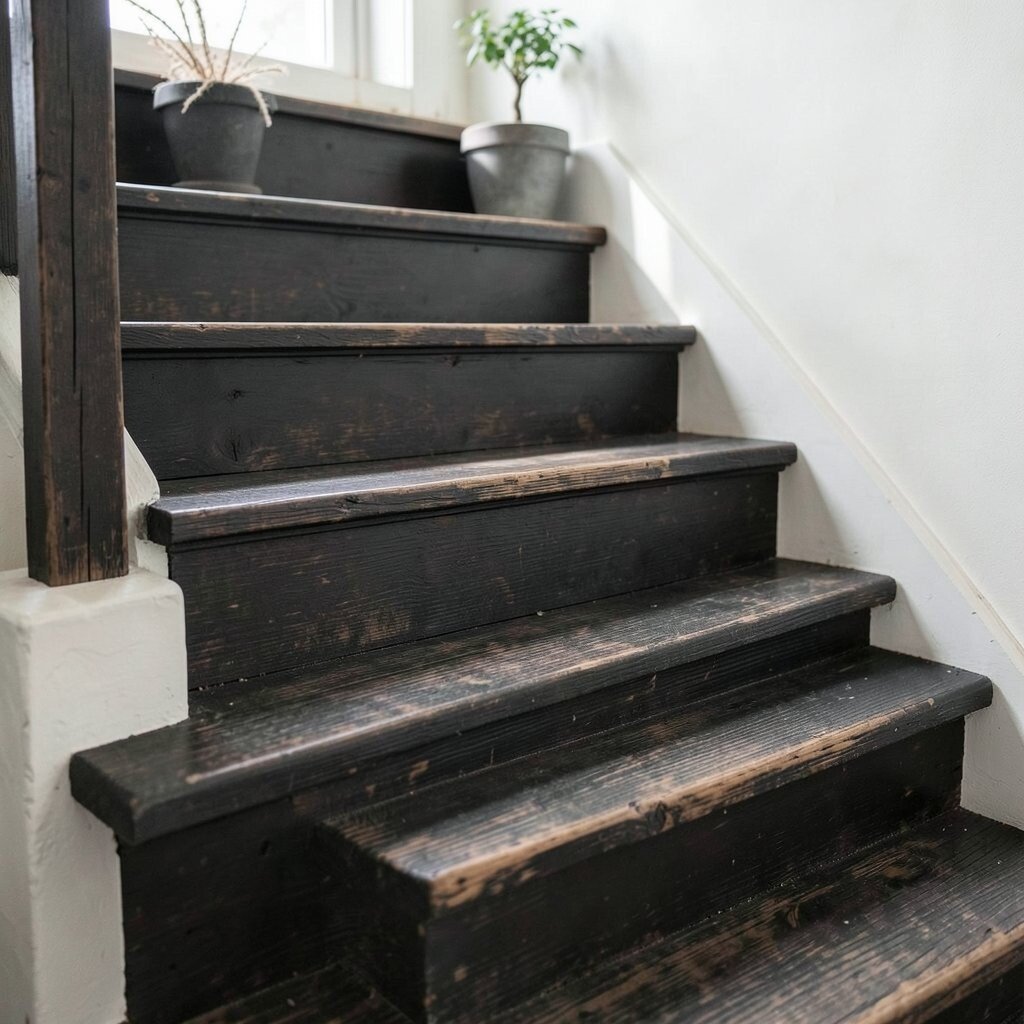
If your stairs are already built and you want a rustic upgrade without major work, a charcoal wash is a great option. This finish darkens the wood while keeping grain visible, so it looks aged rather than painted over. The result can feel like driftwood or old beams from a seaside cabin. Because it uses stain or watered paint, it often costs less than full refinishing.
Start by cleaning the treads and sanding only enough to remove shine. Apply thin layers of wash, wiping off extra so the grain stays alive. Let each coat dry fully before deciding if you need more depth. To personalize, blend in a hint of warm brown so the tone matches your room lighting, which can shift from day to evening.
7. DIY Leather Strap Risers And Step Detail

Leather strap accents bring a rugged, rustic personality to stairs without turning the whole project complicated. You can attach small straps across risers or along the edge of each tread for a subtle industrial twist. The look pairs well with wood, stone, and earthy wall colors. It’s also a fun way to add warmth if your home has lots of hard surfaces.
Choose straps from affordable sources like craft stores or thrifted belts, then treat them with a conditioning product so they stay supple. Plan the placement so straps line up across the staircase for a clean, intentional pattern. If you worry about wear, use hardware designed for light fixtures or cabinetry. For personalization, emboss or paint a simple mark into the leather so it feels like a signature detail.
Cost stays controlled because you’re adding small accents rather than replacing everything. This also makes repairs easier later, since a single strap can be swapped without redoing all the stairs. Keep the straps slightly slack for a relaxed look, but secure them firmly so they don’t shift when walked on.
8. Mixed Brick And Wood Step Caps

Combining brick with wood on stair edges can create a rustic look that feels sturdy and grounded. Add brick step caps at the front corners or create small insets using brick pieces set in adhesive. The texture and color contrast make the staircase stand out, even in a simple space. If your style leans farmhouse or cottage, brick accents fit beautifully.
Measure carefully and keep the pieces small enough to handle without heavy cutting. Seal the brick surfaces so they resist dust and easier cleaning. Use a wood stain that harmonizes with the brick undertone, often warm reds or muted clay. Personalize by mixing brick tones, like adding one darker piece every few steps for visual rhythm.
9. Whitewashed Oak-Look Laminate Over Steps

If you want the look of oak but need a cheaper route, laminate boards can work nicely on stairs. A whitewashed oak tone gives a rustic, airy feel that still shows wood-like texture. Laminate is also a practical choice because it handles everyday scuffs well. When installed carefully, the staircase can look like it came from a stylish showroom.
Choose laminate meant for flooring and check that it can handle foot traffic on stairs. Use a proper underlayer and follow manufacturer guidance for transitions. Add anti-slip strips or grip tape on each tread to keep it safe. For personalization, keep the edges crisp with matching trim so the rustic look feels polished rather than messy.
Laminate can cost less than solid wood and may save you time if your stairs need a full surface refresh. If you have uneven treads, plan for leveling tools so the laminate doesn’t wobble. A simple install can still look custom with the right trim and a consistent pattern direction.
10. Rustic Stair Lighting With Warm Bulbs And Simple Clips

Lighting changes how rustic stairs feel more than people expect. Warm bulbs make wood tones look richer and soften the shadows along each step. You can add budget friendly LED strip lights with simple clips under the rail or along the wall side. The gentle glow helps with safety while making the staircase feel like a cozy hallway.
Choose a warm color temperature and use a dimmer if your wiring allows it. Hide wires along the wall or rail track so the setup stays neat. For a practical upgrade, place lights so they highlight the tread edges rather than blasting overhead. Personalize by matching the fixture style to your existing hardware, like oil rubbed bronze clips or matte black channels.
11. Knotted Rope Side Rails Or Wall-Mounted Hand Support
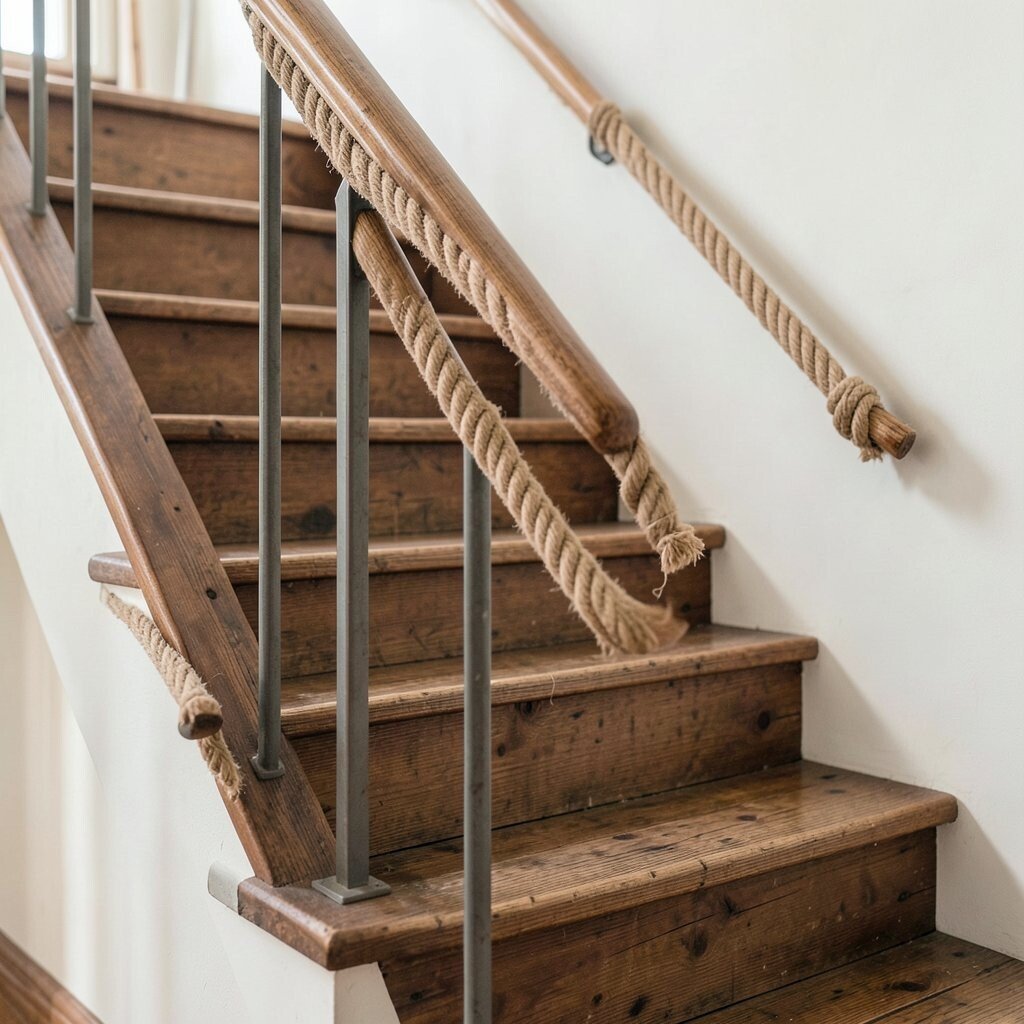
Rope accents can create a rustic, coastal farmhouse vibe without expensive carpentry. Instead of a full railing redo, try a wall-mounted hand support finished in a dark wood stain, then add rope details as visual texture. You can wrap rope around posts or attach it in neat segments to create a pattern. It looks charming and brings softness to an otherwise straight staircase layout.
Use strong hardware anchors so the rope is purely decorative or lightly supportive, depending on local needs and your safety preferences. Choose thick rope that holds its shape and doesn’t fray easily when cut. Tuck rope ends under metal clamps or caps so they look finished. For personalization, vary rope colors slightly, like mixing natural jute with darker hemp, for a layered look.
Cost is often lower than replacing rails, and you can update the look as your style changes. Keep the rope clean by dusting regularly and wiping with a damp cloth when needed. This idea works especially well when your home already has rustic textures like wood beams or woven decor.
12. Stencil A Gentle Border On Risers

Stencils are a budget-friendly way to make simple stairs feel custom. Paint a gentle border on each riser using a matching earthy color, like muted green, warm brown, or soft terracotta. The border catches the light as you climb, giving the staircase a crafted, heritage feel. Stenciling also helps you personalize the design without buying expensive materials.
Pick a stencil pattern that isn’t too busy so it stays rustic and easy on the eyes. Tape off edges carefully and use light coats so the paint doesn’t bleed. If you’re using chalk paint or matte wall paint, seal it with a clear protective top coat for durability. For personalization, rotate the stencil slightly on alternate steps so the pattern looks natural rather than repetitive.
This technique is great for renters too, since the design can be refinished later. It’s also a good way to use leftover paint from other rooms, which helps keep costs under control. Clean up quickly between coats so the lines stay sharp. The end result feels like you spent more than you did.
13. Sand-Texture Finish Using Fine Sawdust And Glue Mix

Want a rough, rustic feel that still looks intentional? You can create a sand-like texture for certain stair surfaces using a fine sawdust and wood glue mixture, then seal it. This gives grip underfoot and adds an aged, craftsman look. It’s a neat trick when you’re working with basic treads that need extra character.
Mix sawdust from the same wood type for a more natural match, then apply sparingly and let it dry completely. Seal the textured areas with a clear coat so the surface stays safe and easy to clean. Test the texture on one tread first because thickness changes how it feels. For personalization, add a tint using a tiny amount of wood stain so the color blends into the rest of your finish.
Cost stays low because you’re using material that’s often leftover from woodworking. Just make sure the textured finish is smooth enough not to snag clothing or shoes. This approach is trendy in craft circles because it celebrates material honesty instead of hiding it under glossy layers.
14. Scrap Wood Accent Steps With Matching Trim

Scrap wood doesn’t have to go to waste, and stairs are a perfect place to use it tastefully. Create small accent strips along tread edges using leftover boards, then finish everything with a matching stain. This method lets you control color variety, so the staircase looks curated instead of chaotic. It also reduces cost by letting you reuse what you already have.
Choose scrap pieces with similar thickness so installation stays simple. Sand them smooth, then attach with wood glue and finishing nails for strength. Add trim along the top edges to make the accents look like part of the original build. Personalize by selecting scrap with visible grain, then rotate the pattern so it flows down the stairs naturally.
This idea works best when your main treads already exist, since you’re adding detail rather than replacing full surfaces. It’s also a fun project for someone who enjoys hands-on DIY. Keep safety in mind by sealing all wood and ensuring nothing sticks up where feet land.
15. Farmhouse Stair Skirting In Reclaimed Paneling

Stair skirting, or the paneling around the side of the stairs, can make the whole area look finished. Reclaimed paneling adds texture and history, especially when you keep the color warm and slightly faded. You can cut panels to fit the skirt area and attach them over older trim. This gives a rustic shell for the staircase, even if the treads are basic.
Look for reclaimed wood panels from salvage yards or old cabinet backs, then sand and seal them before installation. Use a simple paint or clear finish so the wood grain stays visible. For personalization, add a narrow board border in a contrasting tone to mimic farmhouse trim lines. This is also a smart way to hide small gaps or uneven edges near the base.
Cost considerations are usually favorable because paneling can be cheaper than new custom millwork. If you have a limited budget, focus on skirting first because it creates the biggest visual payoff. Make sure the paneling is securely fastened and use caulk where needed for a clean seam. With careful fit, the staircase looks intentional and sturdy.
16. Chalk Paint Tread Covers With Non-Slip Backing

Painted tread covers can give your stairs a charming rustic look without touching the underlying wood much. Use chalk paint style finishes on individual tread covers, then add non-slip backing underneath. You can choose designs like lightly distressed stains or a simple solid color that ties into your walls. This makes it easy to refresh the staircase later if your style changes.
Keep covers lightweight so they sit flat, and use strong adhesive or fabric grips on the underside. Seal the painted surface so it doesn’t scuff every time shoes pass. For personalization, paint subtle faux wood grain on one or two treads so the look feels special. You can also use a mixed palette, like cream and warm gray, to match your rustic decor.
This approach is great for renters because you can often remove covers without damaging floors. It also helps if some treads are worn unevenly, since covers even out the look. Cost stays manageable because you’re buying paint and grip materials rather than full stair resurfacing.
17. Weathered Metal Tread Nosing For Extra Traction

Metal tread nosing gives a practical boost while adding rustic character. Weathered finishes in bronze, blackened steel, or dull copper look great next to wood and create strong edge definition. They also help prevent slipping, which is a big deal for families and guests. This idea works with almost any stair style, from farmhouse to lodge.
Measure each tread edge and buy nosing that fits the width so installation stays tidy. Use screws and secure anchors according to the manufacturer instructions for a solid hold. If you like a distressed look, choose pre-weathered metal or finish it with a rust-like patina product. For personalization, coordinate the nosing color with your door hardware or light fixtures so the staircase feels part of the same story.
Cost considerations are usually moderate, but the durability can save you money later by reducing wear on the edges. Keep the rest of the stair finish simple so the metal becomes the feature. A well-installed nosing looks intentional, safe, and beautifully rustic from day one.