The ceiling is the quiet part of your room, until you give it attention. Small changes can make a space feel fresh and finished.
Start simple, learn as you go, and enjoy how much your room can change.
1. Painted Accent Band Above the Room
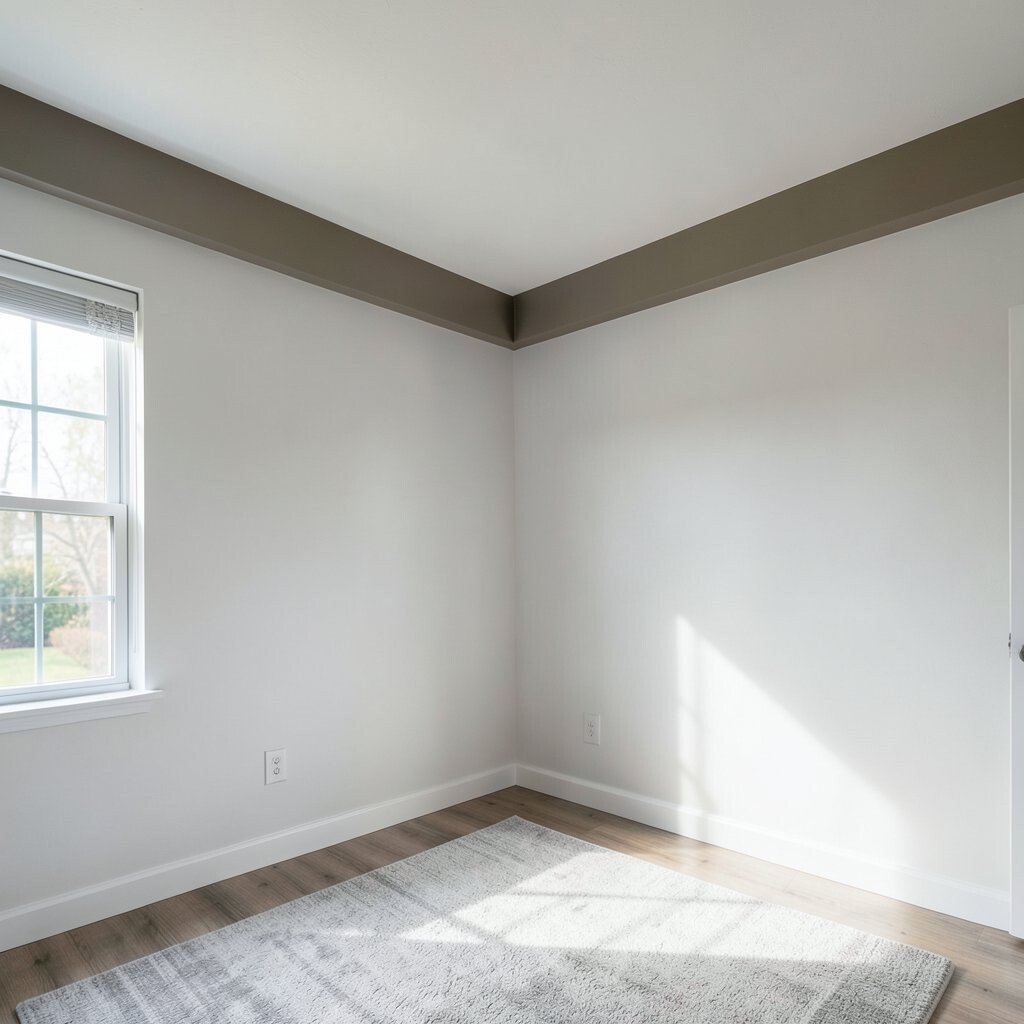
Picture a clean strip of color running along the ceiling edge, like a soft frame around the room. It pulls the eye upward and makes the walls feel taller.
Choose a paint shade that matches your room’s main color, then use painter’s tape for crisp lines. You can keep it narrow for a tidy look or widen it for a bolder style. This project is beginner-friendly because paint covers mistakes and dries fast.
2. Faux Coffered Panels With Simple Moldings
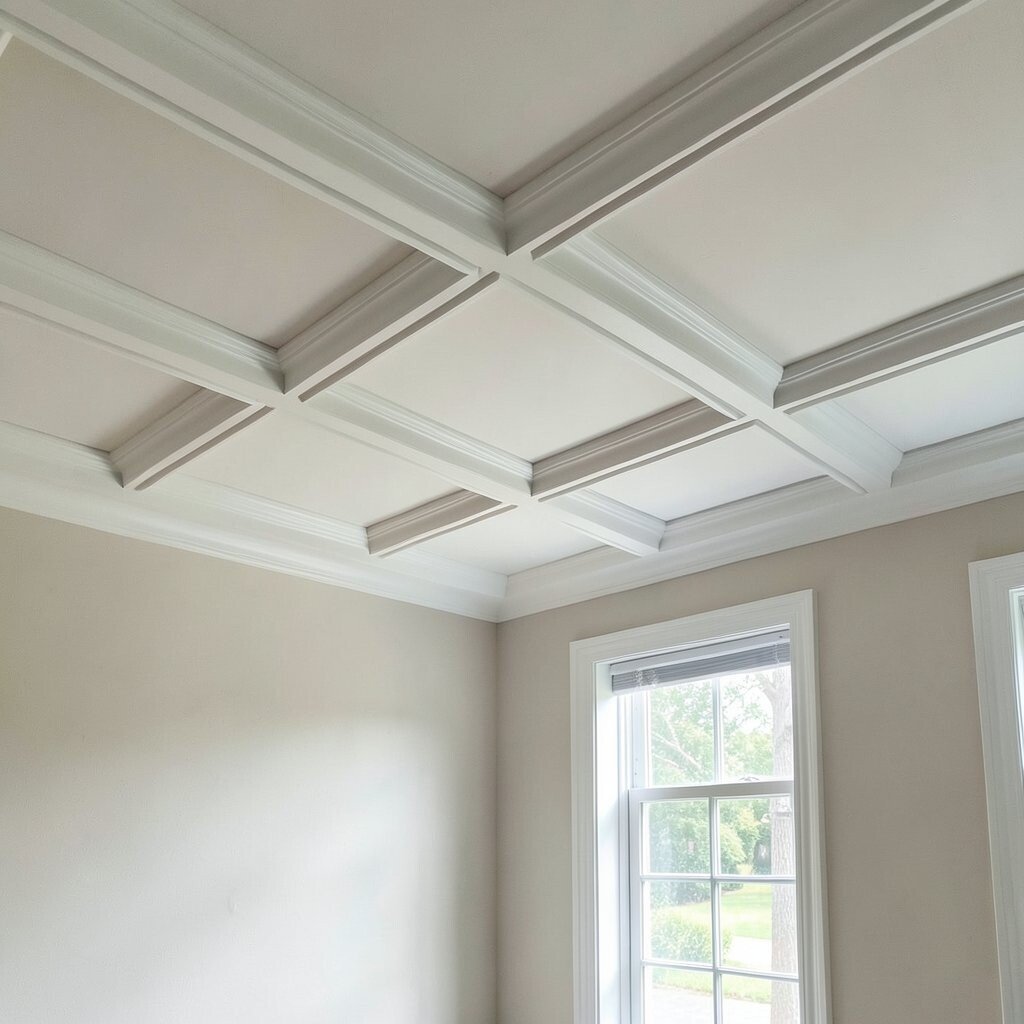
Imagine your ceiling turning into a grid of raised squares, even without heavy carpentry. Light shadows will gather in the channels and make the whole room feel more “styled.”
Pick foam or lightweight trim boards, then map a grid with a pencil and measuring tape. Use construction adhesive and a finish caulk for smooth edges. Keep panel sizes consistent, and test your layout with masking tape before you attach anything.
Current trends favor clean lines and subtle contrast, like white panels over a soft warm base. For cost control, buy the cheapest primer and paint you like, then finish with one top color. Personalize it by using a slightly darker shade inside the panels so depth shows even in daylight.
3. Geometric Peel-and-Stick Ceiling Tiles
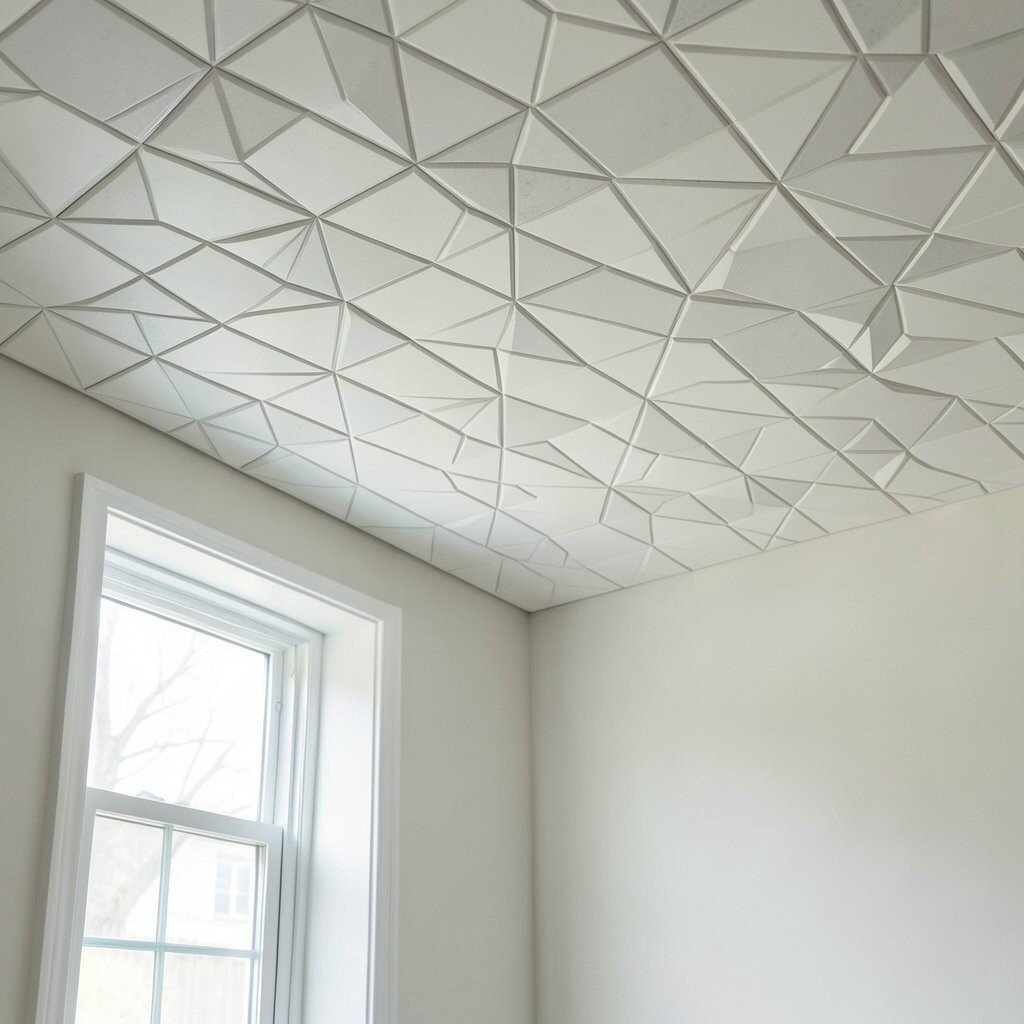
Think of repeating shapes across the ceiling, like a modern pattern floating overhead. The room instantly looks more intentional, even if your walls stay plain.
Choose peel-and-stick tiles with a light texture, since they hide tiny bumps better. Clean the ceiling well, press firmly along edges, and work in straight rows. Start in the center so your pattern feels balanced.
Many people like these tiles right now because they are fast and removable, which helps if you rent. A neutral palette keeps the look calm, while black or deep green adds drama. For a custom touch, mix two shapes and alternate rows for a simple rhythm.
4. Warm Lighting With a Ceiling Medallion and Bracket
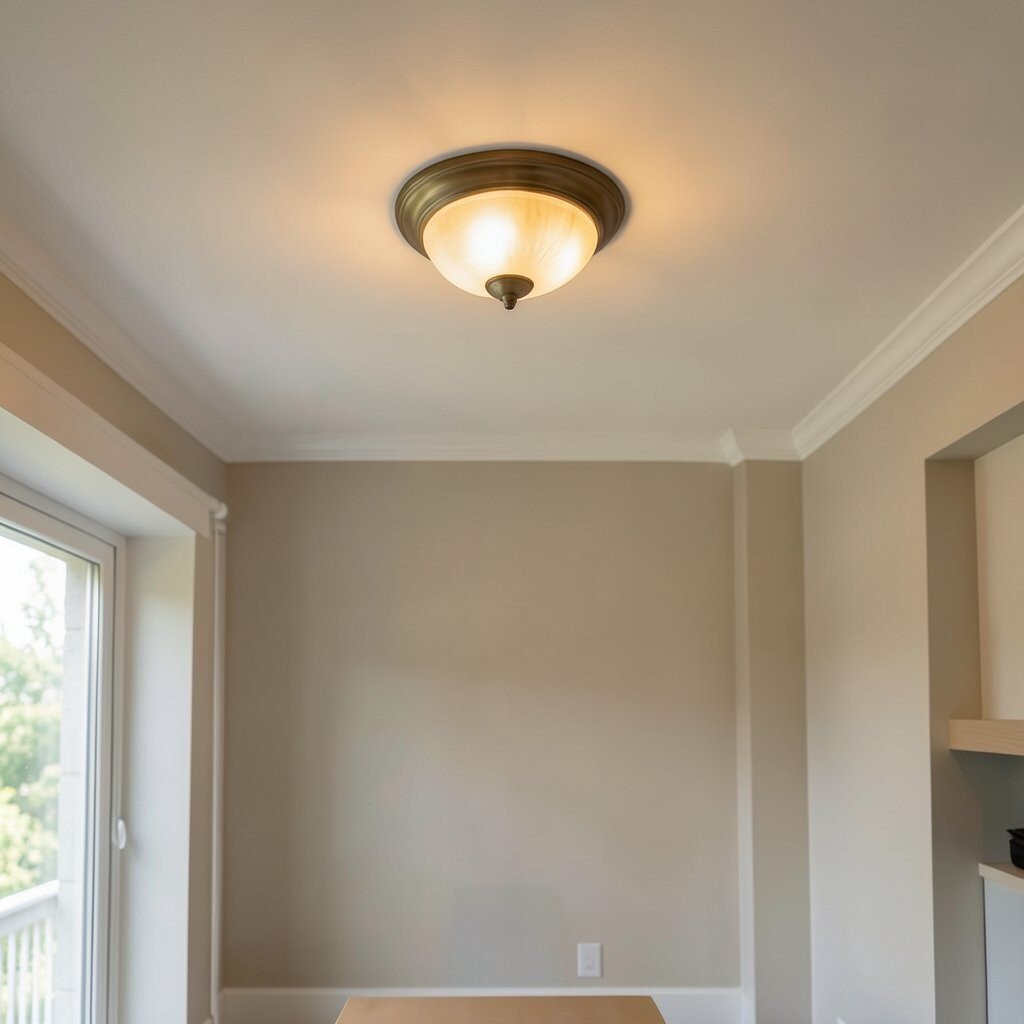
Picture a circular medallion around your ceiling light, like a small spotlight for your everyday space. The glow looks cozy and the ceiling feels framed, not blank.
Mount a medallion and a decorative bracket around the fixture, then paint the piece to match your ceiling or trim. Use a sturdy mounting method and turn off power at the breaker before you touch wiring. Keep it practical by using a bulb with warm color so the whole room feels inviting.
5. Shiplap-Style Planks on a Single Ceiling Section
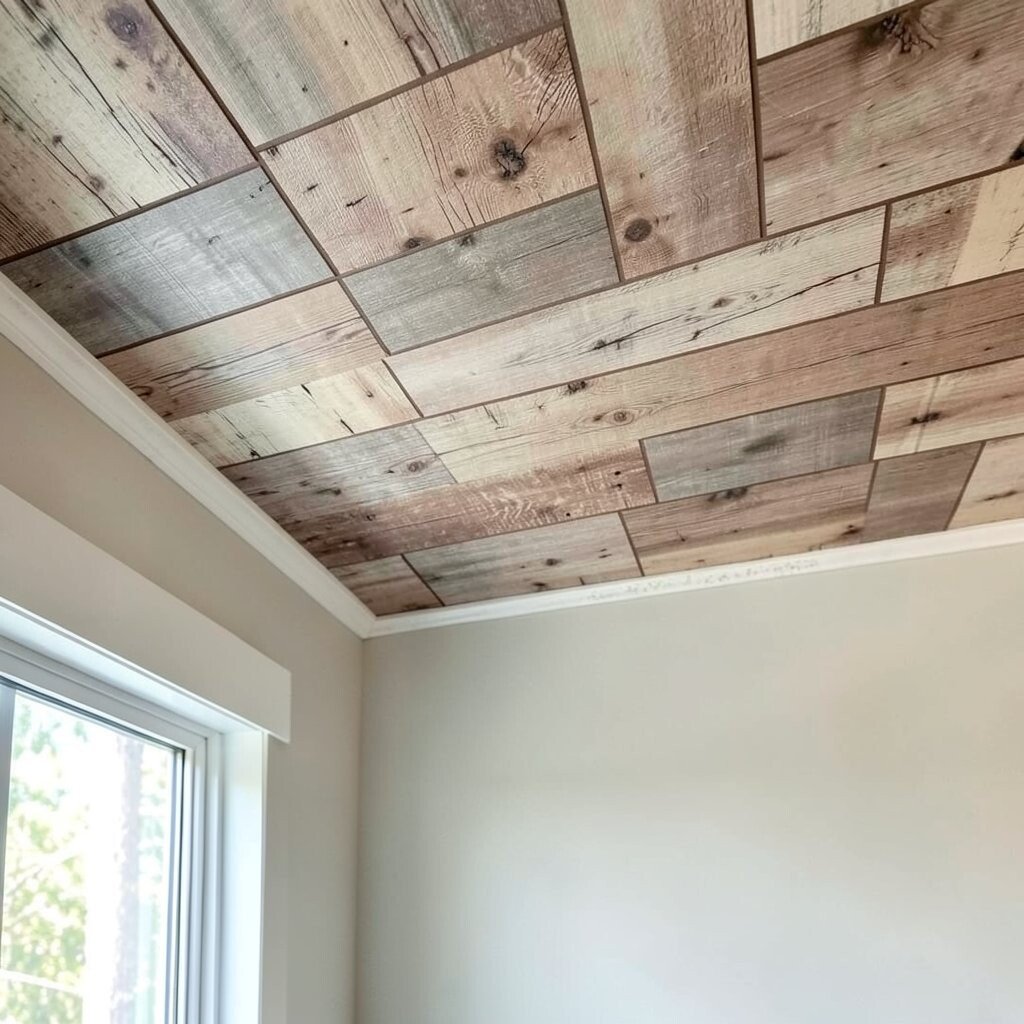
Imagine narrow planks running in one direction, creating a relaxed, coastal feel overhead. Even a small section can make the room feel layered and warm.
Install shiplap-style boards only over a focal area, like above the bed or dining table. Keep alignment simple by using a starter strip and a level each row. This approach helps you spend less time and money while still getting the “wow” effect.
Beginners often love this because it is forgiving and visually forgiving too. To personalize, stain the wood a light oak color or paint it a soft white for a crisp look. If you want current style, try pairing the planks with modern lighting and simple wall art.
6. Fabric-Covered Ceiling Panels for Soft Style
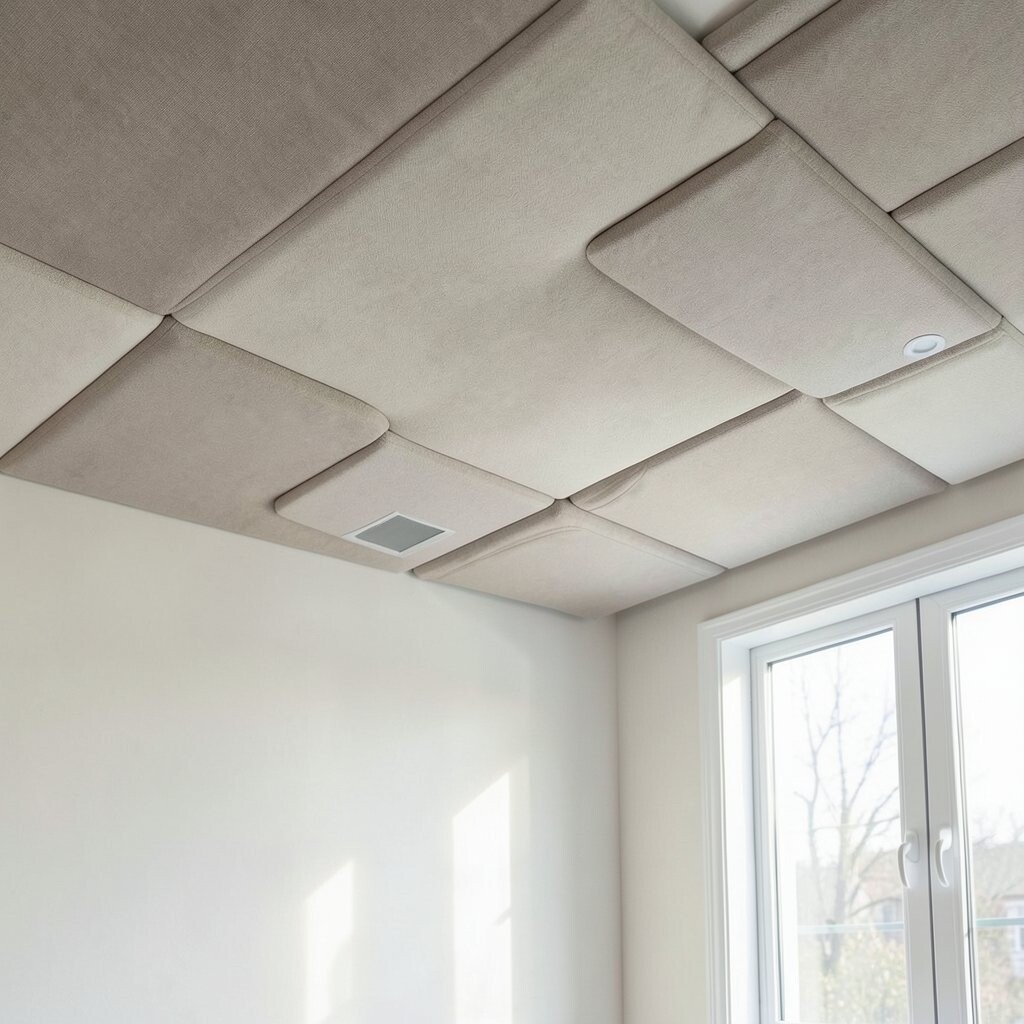
Picture a gentle, fabric texture stretched across the ceiling like a calm canopy. It adds warmth and can soften echoes in the room.
Select lightweight fabric that won’t sag, and attach it to a flat backing like foam board or thin panel board. Use spray adhesive carefully and smooth wrinkles as you go. For safety and comfort, keep fabric away from direct high-heat fixtures.
Because it looks unique, this is a great option for bedrooms or reading nooks. Consider using neutral linen tones for a timeless feel, or choose a subtle pattern for personality. To budget wisely, use fabric remnants or clearance fabric and cover only a few sections.
7. Faux Wallpaper Ceiling With a Patterned Roll
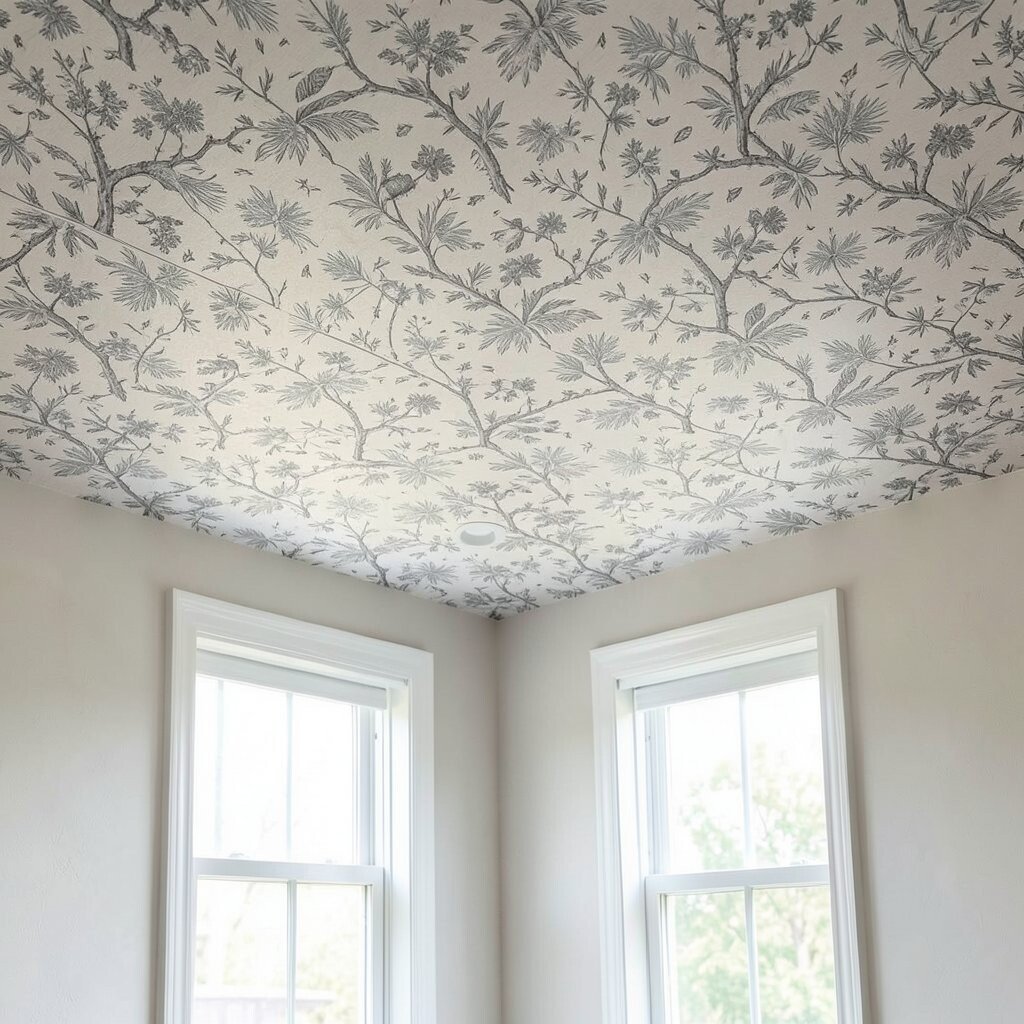
Imagine a ceiling covered in a repeating pattern while the walls stay simple. The room gains character because your eyes catch the ceiling first.
Use removable wallpaper if you want easy future changes, and apply it in neat sections. Prep the ceiling by cleaning dust and ensuring it is smooth, since texture can show through. Smooth slowly with a plastic tool so bubbles don’t form.
8. Add Peel-and-Stick Starbursts for a Playful Look
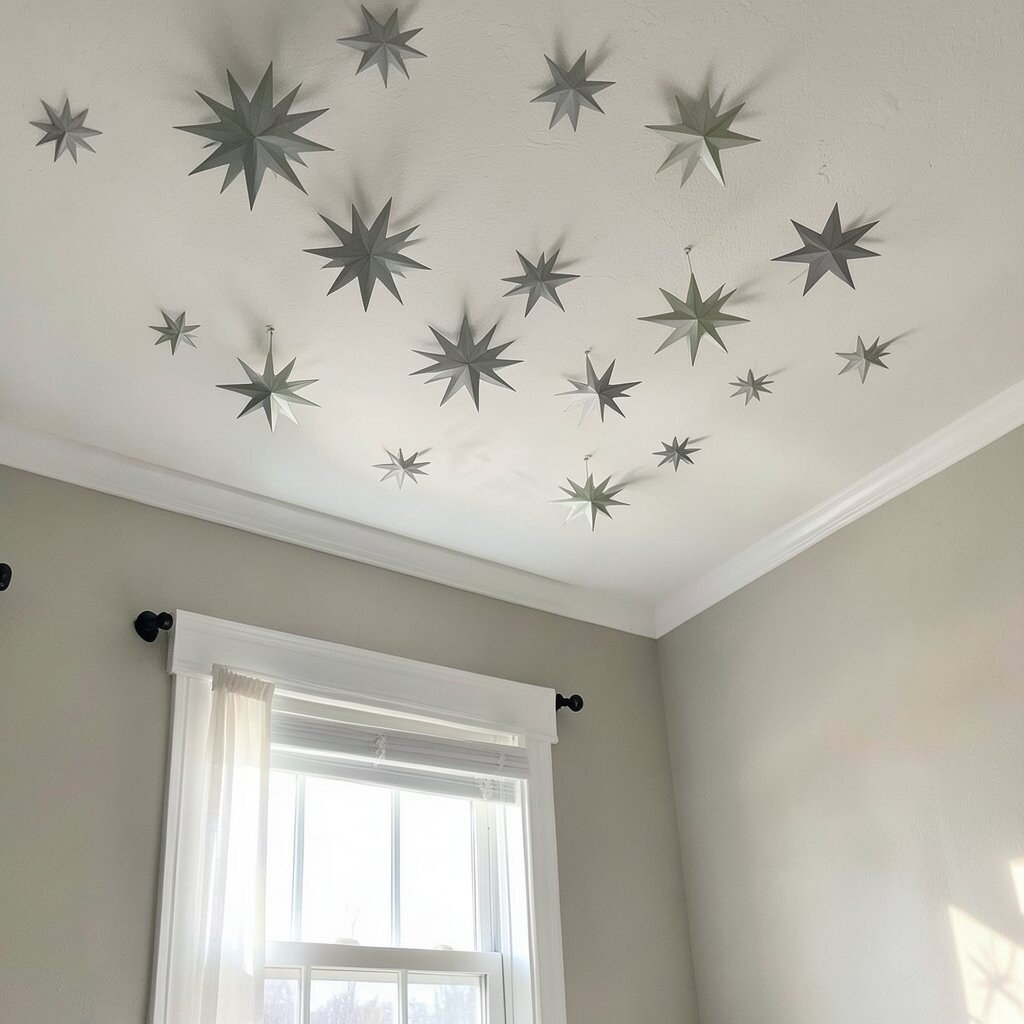
Picture a burst pattern near a light fixture, like a little celebration overhead. It feels fun without taking over the entire room.
Choose starburst decals or vinyl stickers and place them around the center point you want to highlight. Measure lightly, then press firmly so edges bond well. This method is great for beginners because you can rearrange before everything sticks.
If you follow current trends, you’ll notice playful ceiling moments in kid rooms and creative workspaces. Keep it cohesive by picking colors already used in curtains, pillows, or rugs. For personalization, match the starbursts to a theme, like soft pastel shapes for a gentle mood.
9. Limewash or Chalk Paint for a Textured Ceiling
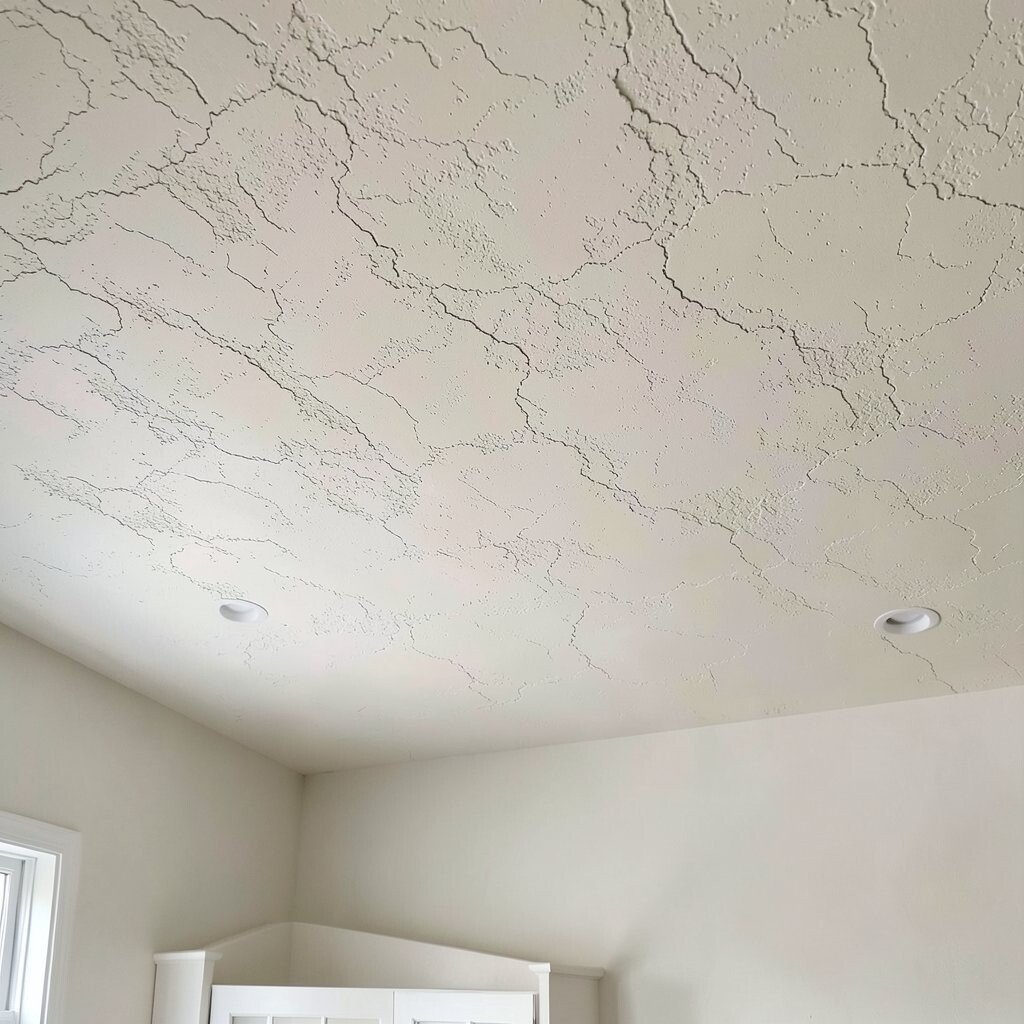
Imagine a ceiling with a soft, cloud-like texture that makes light look gentle. It gives your room a handmade feel without complicated tools.
Use chalk paint or limewash style paint for an easy finish, and apply in thin layers. Test a small spot first, because texture can vary by ceiling surface. A slightly darker tone than your walls can create depth while still feeling airy.
This is popular now because it looks natural and hides small imperfections. Keep costs low by buying one quality paint bucket and using inexpensive brushes for textured strokes. Personalize with earthy tones like warm sand or muted sage for a cozy, modern vibe.
10. Create a Simple Frame With Trim Around the Ceiling Edge
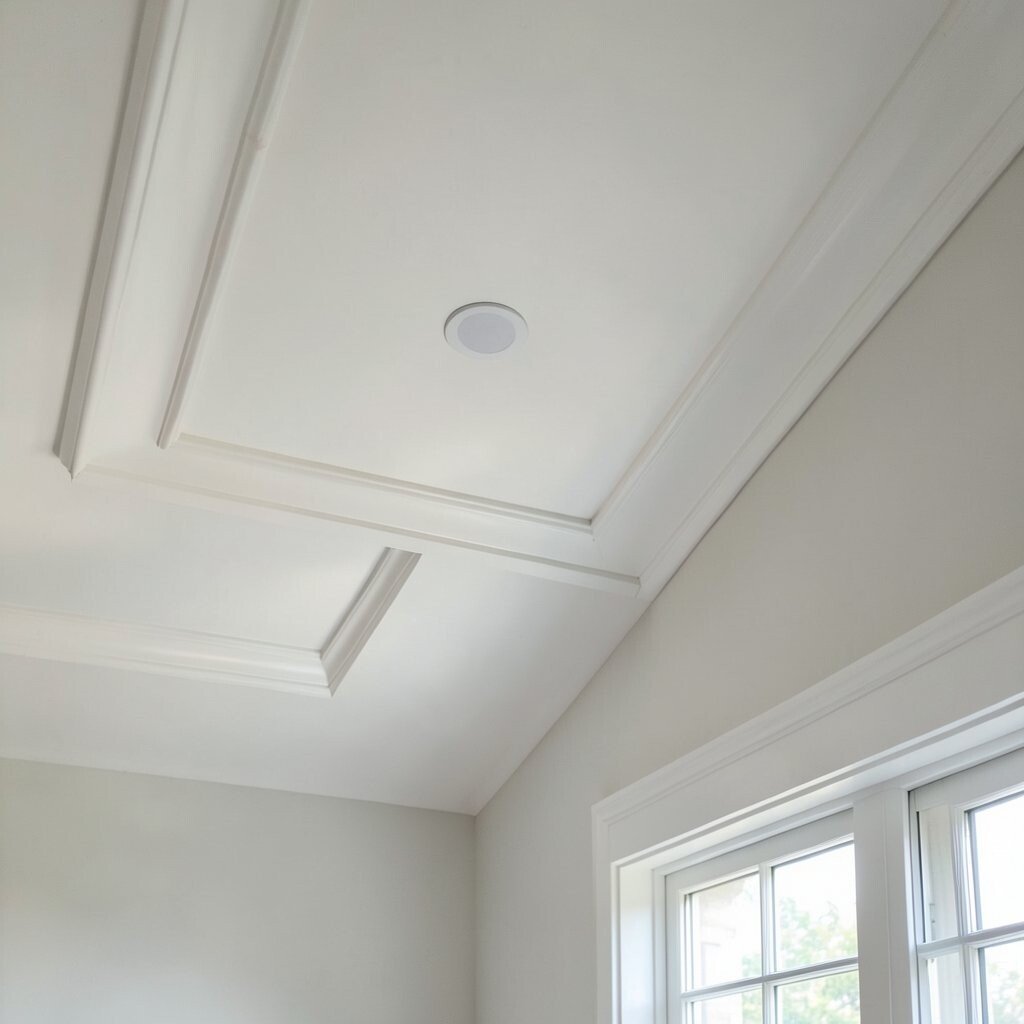
Picture a clean “picture frame” effect along the perimeter of the ceiling. It instantly makes your ceiling feel designed even with plain paint.
Cut trim pieces to fit the room edges, then attach them with construction adhesive and light nails if needed. Use caulk at the joints for a smooth look that hides gaps. Paint the frame and ceiling together for a seamless finish, or choose a contrasting color for drama.
Because it is straightforward, it suits beginners who want clear steps. This project also fits current style trends that emphasize sharp lines and calm neutrals. For budgeting, measure your perimeter carefully and buy only what you need, then use leftover trim for touch-ups.
11. Drop-In Ceiling Light Rails With Decor Lining
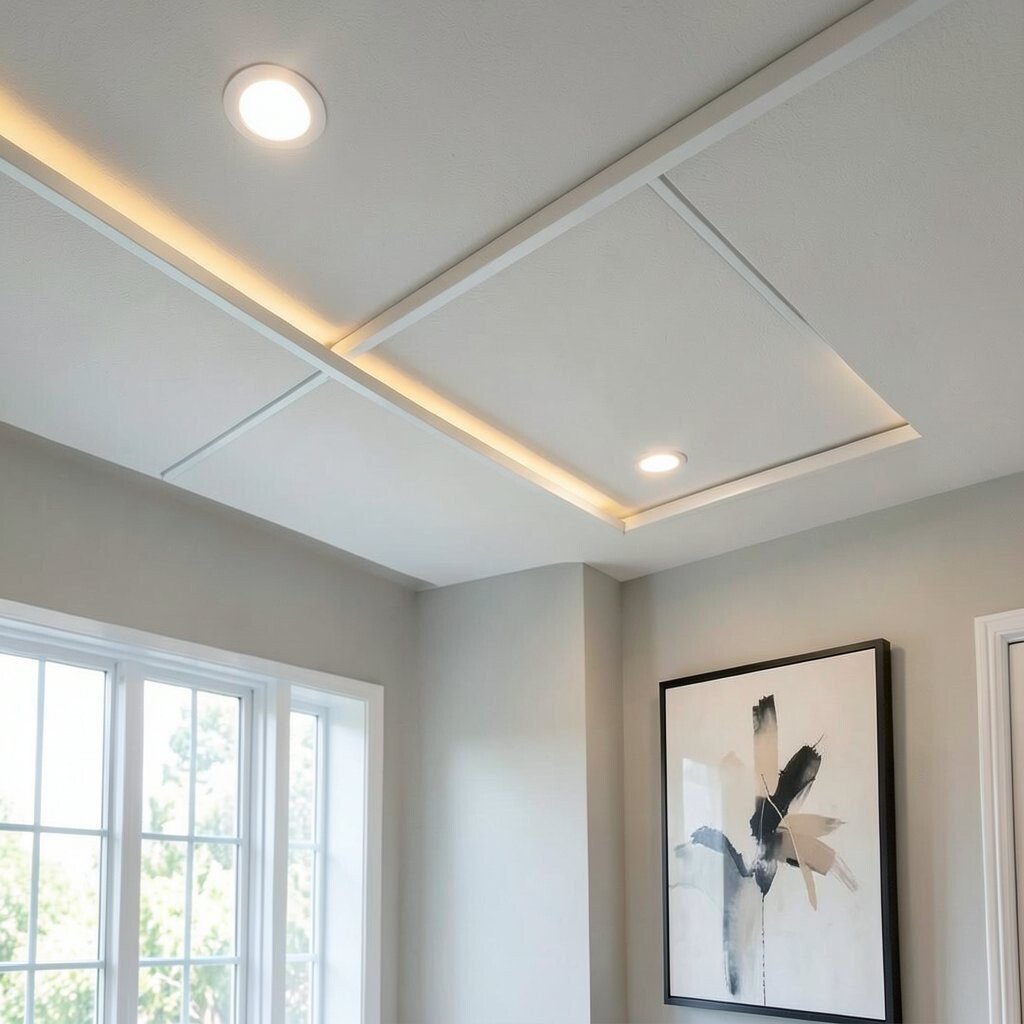
Imagine a narrow rail around a light fixture that looks like it belongs there. It draws attention to your lighting and gives the ceiling a finished border.
Install simple LED trim or a small decorative rail, then add a thin lining detail, like a metallic strip or matching paint line. Make sure the rail sits level, since uneven edges show up fast. For practical comfort, use dimmable lighting so the ceiling effect can change with the day.
12. Ombre Ceiling Paint From Center Down
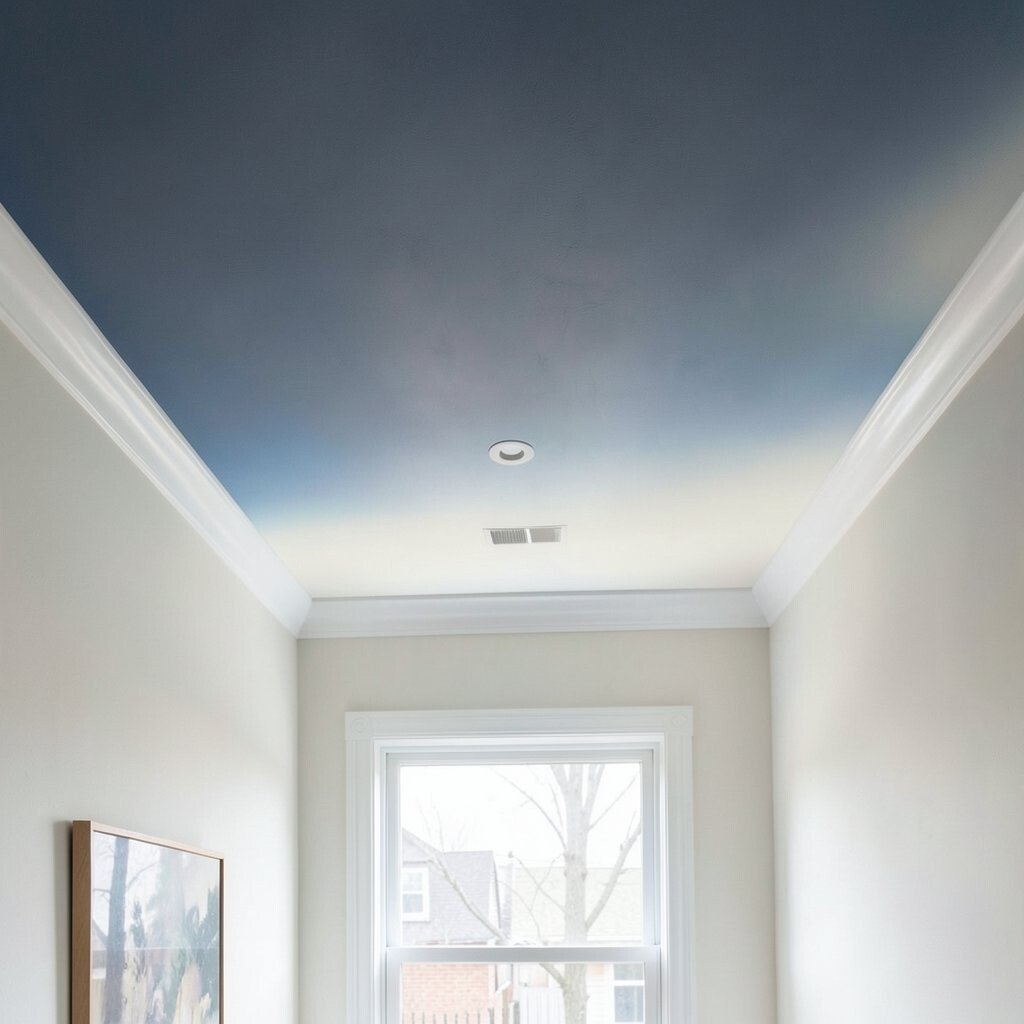
Picture a soft fade that starts darker near the middle and gets lighter toward the edges. The room feels taller and more dreamy, especially under warm light.
Plan the center point above the main light, then blend paint outward with a sponge or brush. Use painter’s tape to create gentle boundaries for each blend stage. Keep your ceiling color base as the lightest tone so the final look stays airy.
Ombre effects are a current favorite because they add artful movement without clutter. Save money by using two or three shades you can mix from a single base color family. Personalize by choosing a shade that matches your decor, like dusty blue for calm or soft plum for cozy contrast.
13. Install Lightweight Gypsum or Foam Cornice Lines
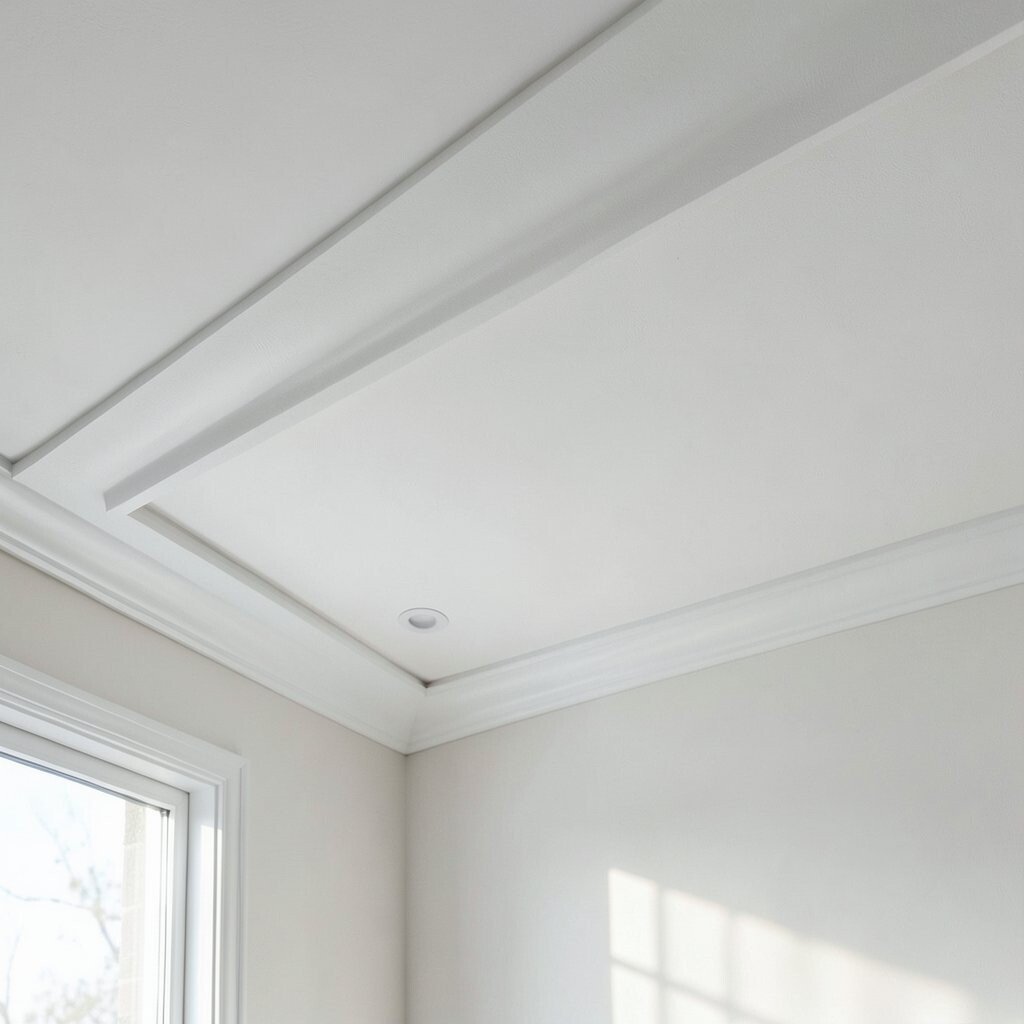
Imagine delicate curved lines near the ceiling top, like a subtle crown. This style adds elegance and makes simple rooms feel classic.
Use pre-made foam or gypsum-style cornice strips, then fit them around corners with careful miter cuts. Glue them down, wipe away extra adhesive, and fill tiny gaps with caulk. Paint the cornice to match your ceiling for a soft look, or paint it slightly off-white for warmth.
This kind of detail is unique because it feels architectural even when you keep it simple. It’s also beginner-friendly since the materials are lighter than traditional plaster. For cost considerations, buy the smallest packs and focus on the main visible sides first if your room is open-plan.
14. Ceiling Stencils Over a Neutral Base
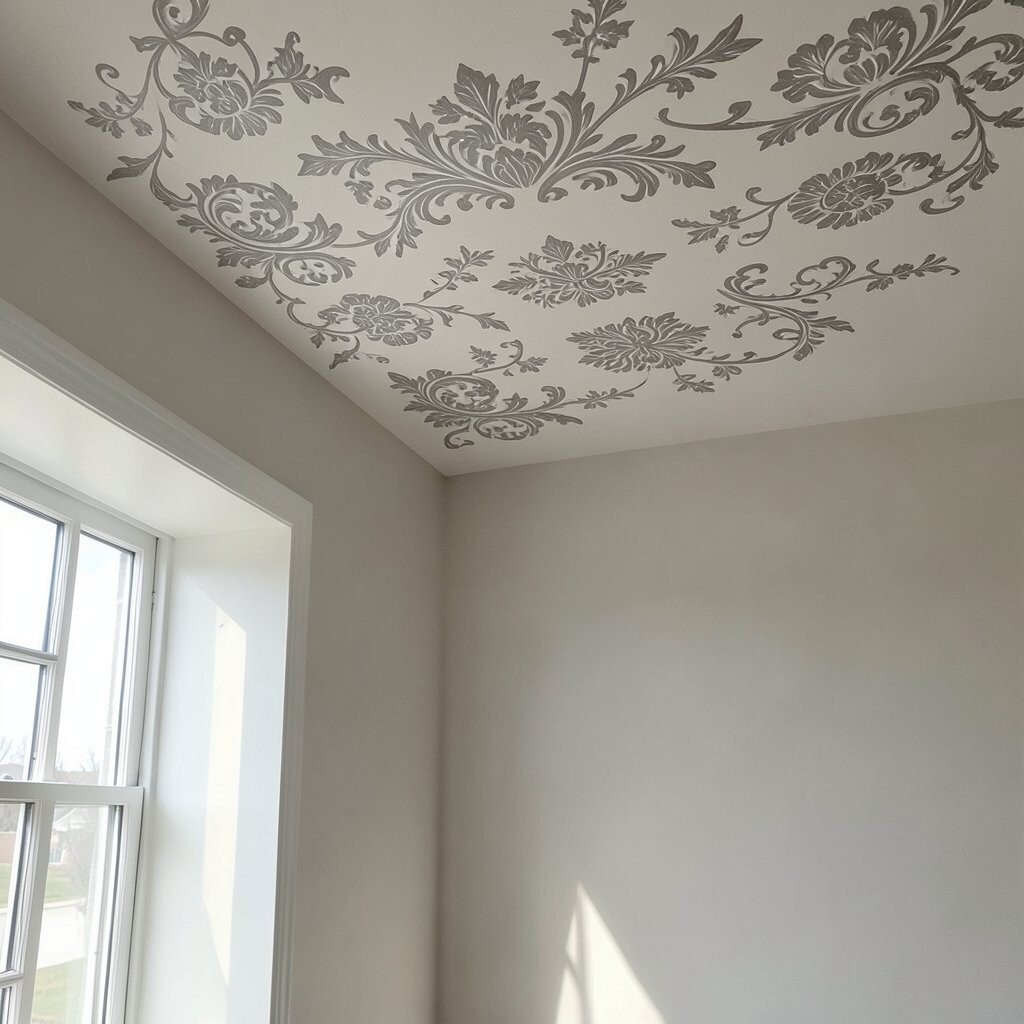
Picture a patterned ceiling in repeating motifs that look crisp and intentional. Stenciling gives you “designer” style while using basic tools.
Start with a smooth, freshly painted ceiling, then tape down a stencil and apply paint lightly with a foam brush. Work slowly so the pattern edges stay clean. Re-align carefully so repeats match where you expect them.
Stenciling remains popular because it is easy to personalize for any theme, from florals to modern waves. Keep costs down by using small stencil sets and reusing the stencil across the whole ceiling. For a unique twist, center the pattern around the fixture and leave the rest plain for balance.
15. Add a Wooden Beam Look With Simple Faux Panels
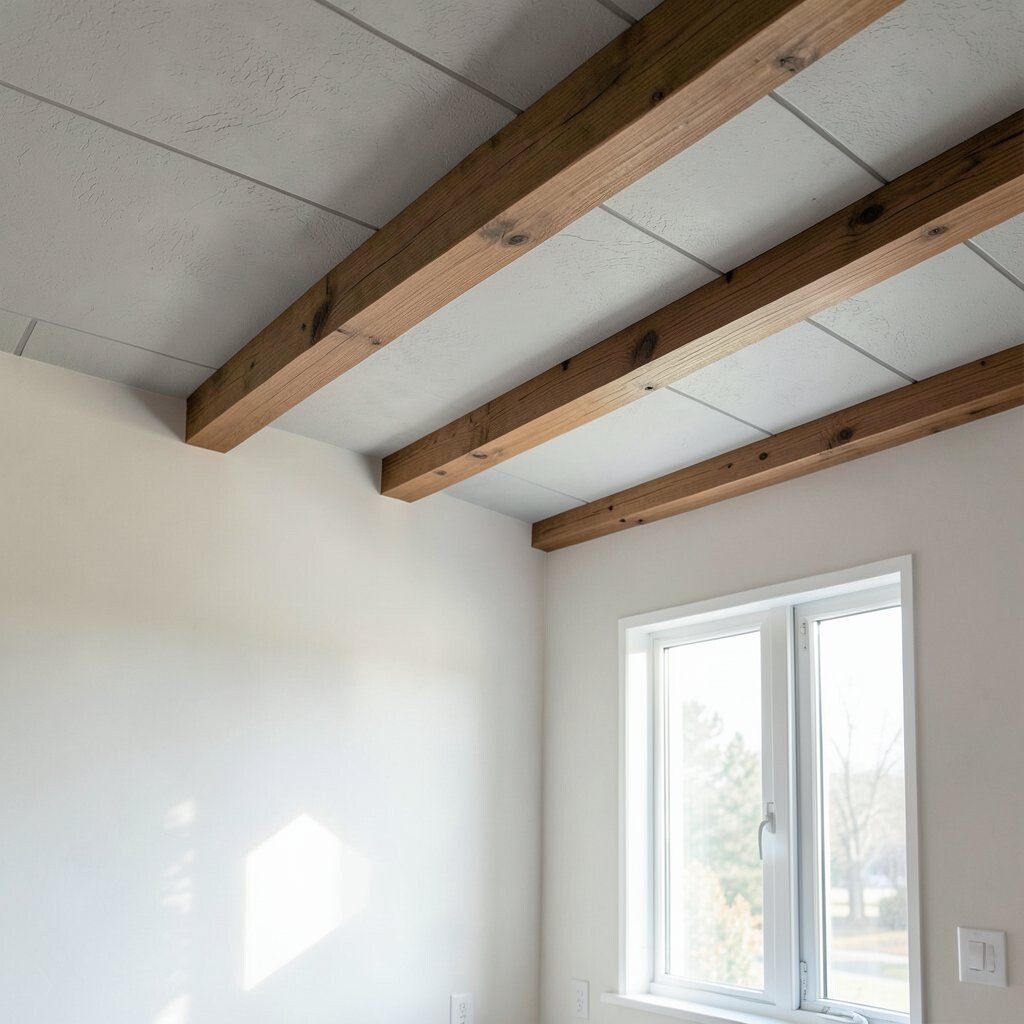
Imagine thick faux beams stretching across the ceiling, like a rustic cabin feel. The room gains instant character without changing your entire ceiling structure.
Use lightweight faux beam strips, attach them across pre-measured spacing, and paint or stain them to match your room. Keep spacing consistent so the grid feels calm and not chaotic. A clear coat helps the finish look smooth and durable.
This style is trending because it mixes farmhouse charm with modern lighting. For cost, choose beams that are wide enough for impact but affordable enough to cover only one main direction. Personalize by painting beams a darker shade than the ceiling for strong contrast.
16. Create a Ceiling “Gallery” With Small Hanging Ribbons
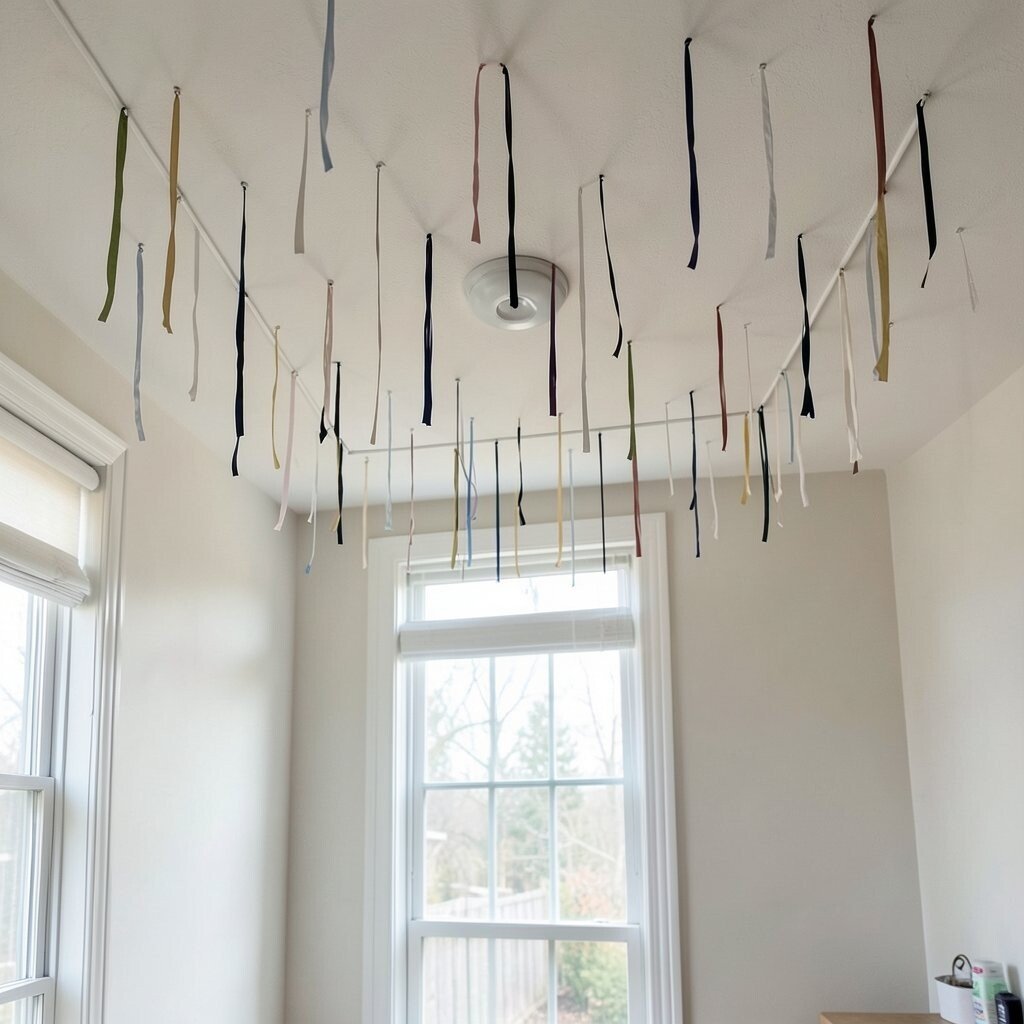
Imagine thin ribbons hanging near a light, moving gently as the air moves. It gives a soft, whimsical touch without needing heavy installs.
Attach ribbon loops to ceiling hooks or a small track so each ribbon has a measured length. Keep them short enough to stay clear of the fixture and walking paths. Choose colors already found in your room so the look feels coordinated.
This ceiling detail feels unique because it changes with movement and lighting. It is also budget-friendly, especially if you use leftover craft ribbon. For personalization, try gradients like light to dark so the ceiling effect looks intentional and not random.
17. Minimalist Stripes With Paint Lines in Matching Colors
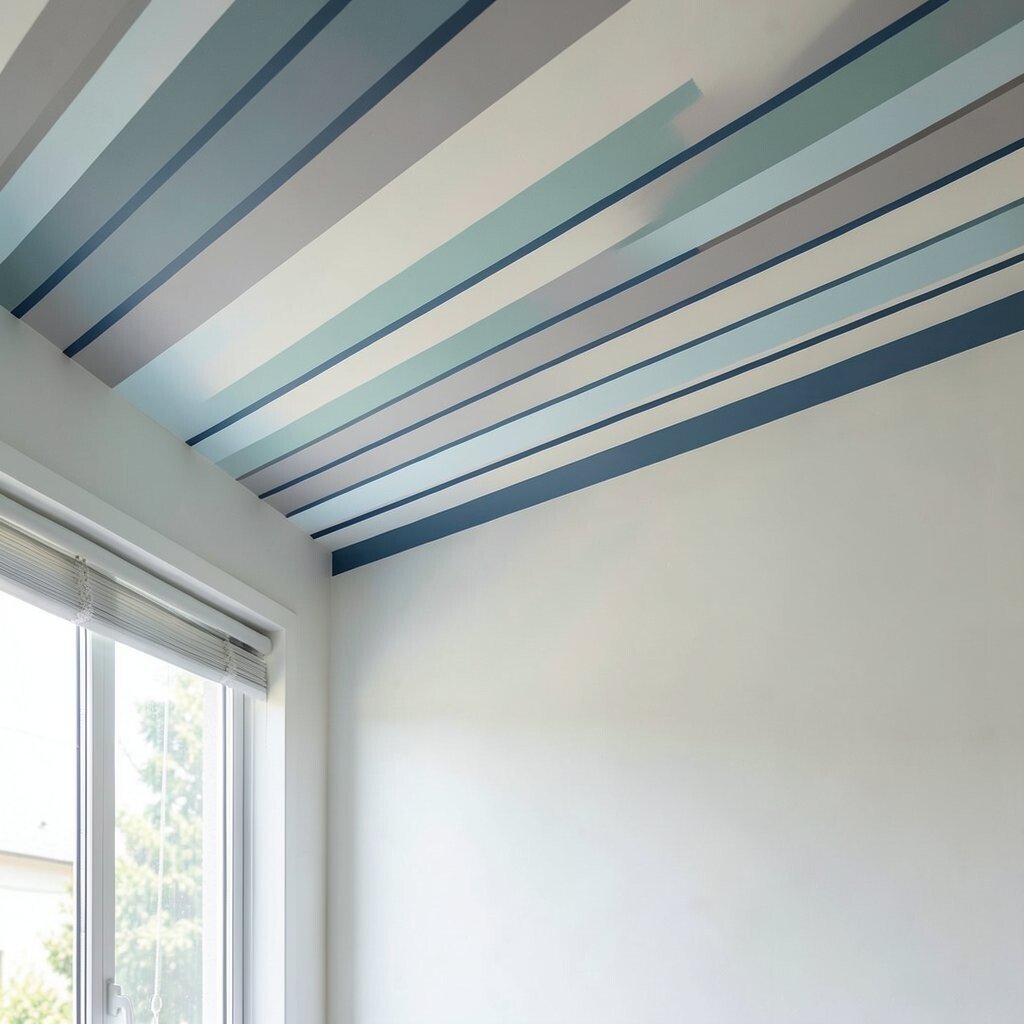
Picture narrow stripes that run parallel across the ceiling like gentle waves. They make the space feel organized and visually crisp.
Use painter’s tape to mark stripe positions, then paint and remove tape carefully while paint is slightly set. Choose a stripe color that matches your trim or a shade pulled from your rug. If your ceiling is textured, press tape firmly for clean edges.
18. Install Decorative Ceiling Lights With Fabric Shades
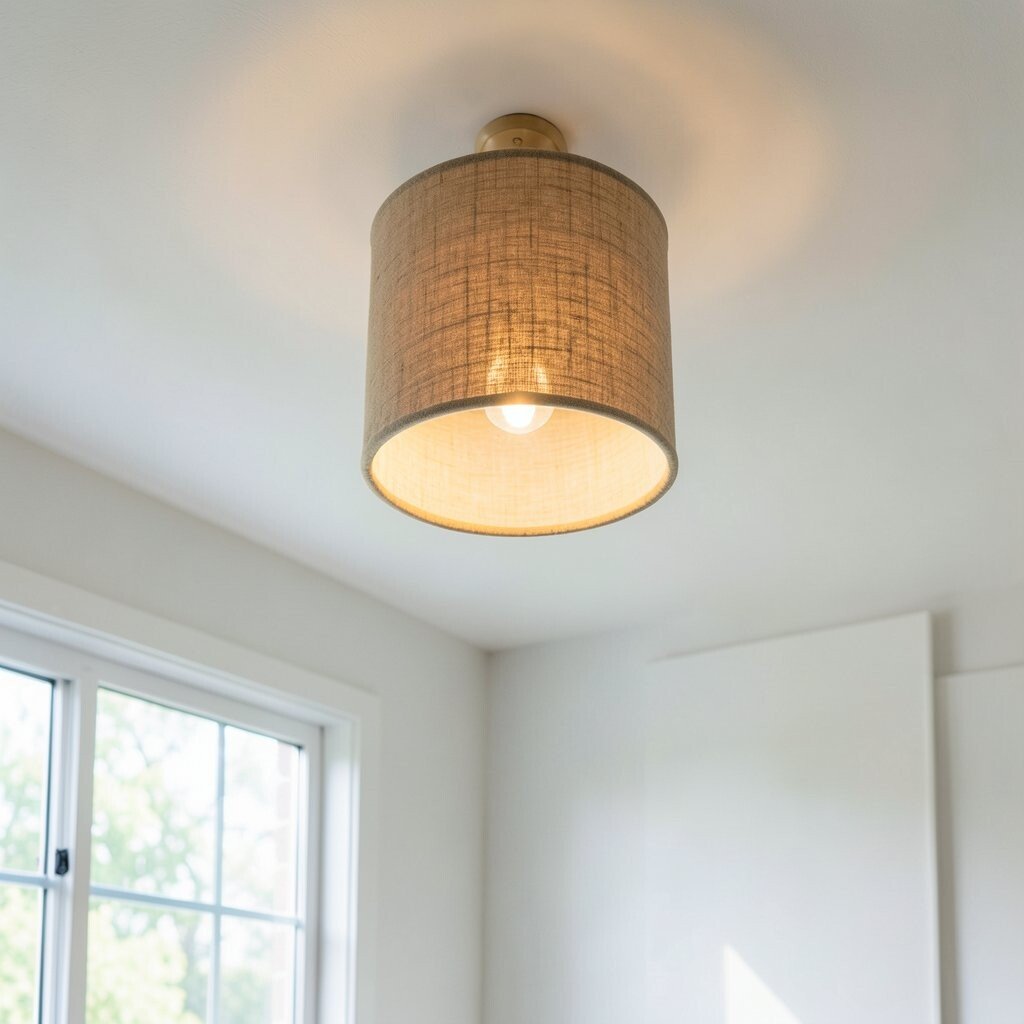
Imagine changing the whole ceiling vibe just by swapping the fixture and adding a soft shade. The ceiling becomes warmer, and shadows look nicer on the walls.
Choose a fixture with a simple shape and a fabric or linen shade for a beginner-friendly style upgrade. Make sure it fits your ceiling height and electrical box properly, and follow local safety guidelines. For personalization, pick a shade color that matches your curtains or throw pillows.
This is a current trend because people want cozy lighting more than complicated ceiling construction. Costs vary by fixture choice, so you can start with a budget-friendly shade and upgrade hardware later. The benefit is huge because light affects how all your other ceiling designs look.
19. Raised Ceiling Letters or Shapes With Foam Cuts
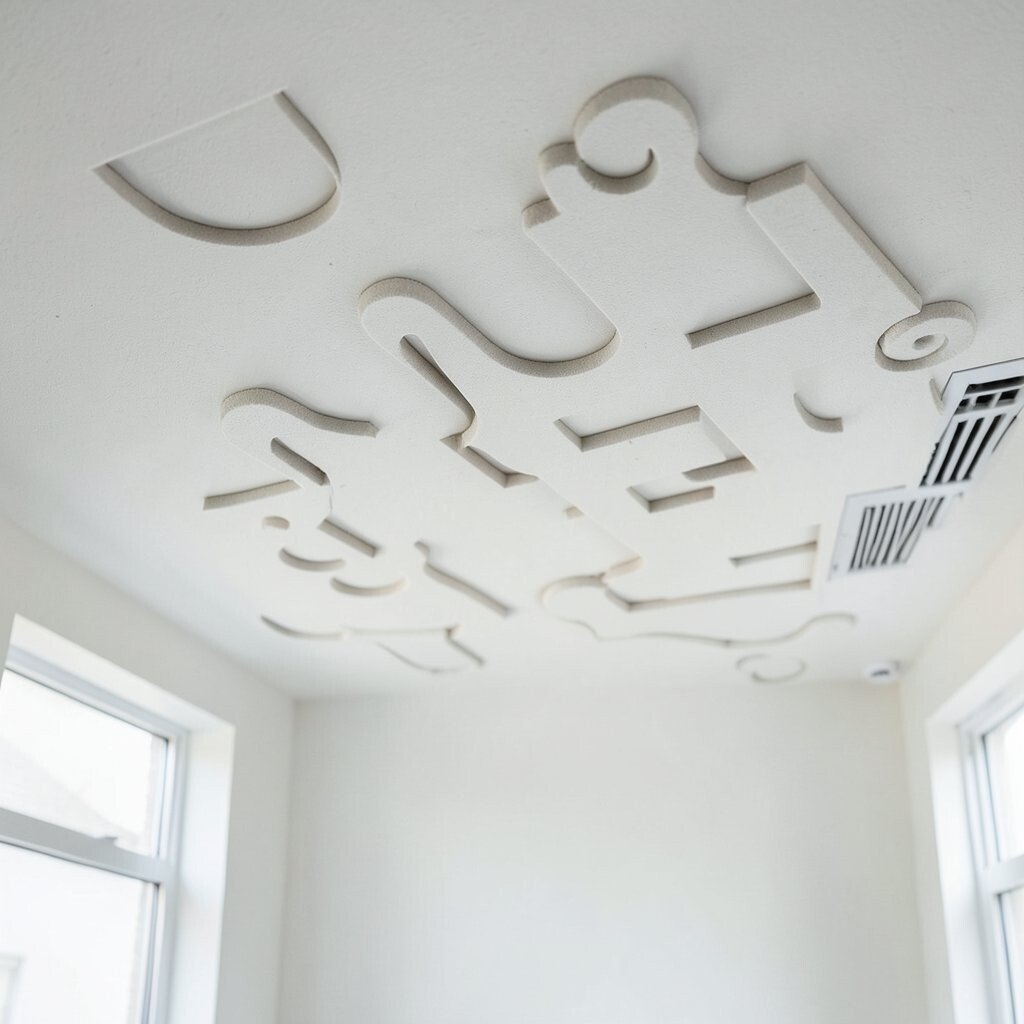
Picture a few bold shapes or letters sitting on your ceiling like gentle art. It feels personal and playful, especially in a home office or nursery.
Use foam craft sheets or lightweight cutouts, then paint and seal them before mounting. Place them around your light or in a small cluster so they don’t clutter the ceiling. Secure with strong adhesive and make sure everything is firmly attached.
This project is unique because it turns the ceiling into a message board without needing wall space. Keep it budget-friendly by cutting only a few shapes and using simple colors. Personalize the design with a meaningful symbol, like a star, leaf, or initial in a color that matches your decor.
20. Marble-Look Spray Finish for a Faux Luxury Ceiling
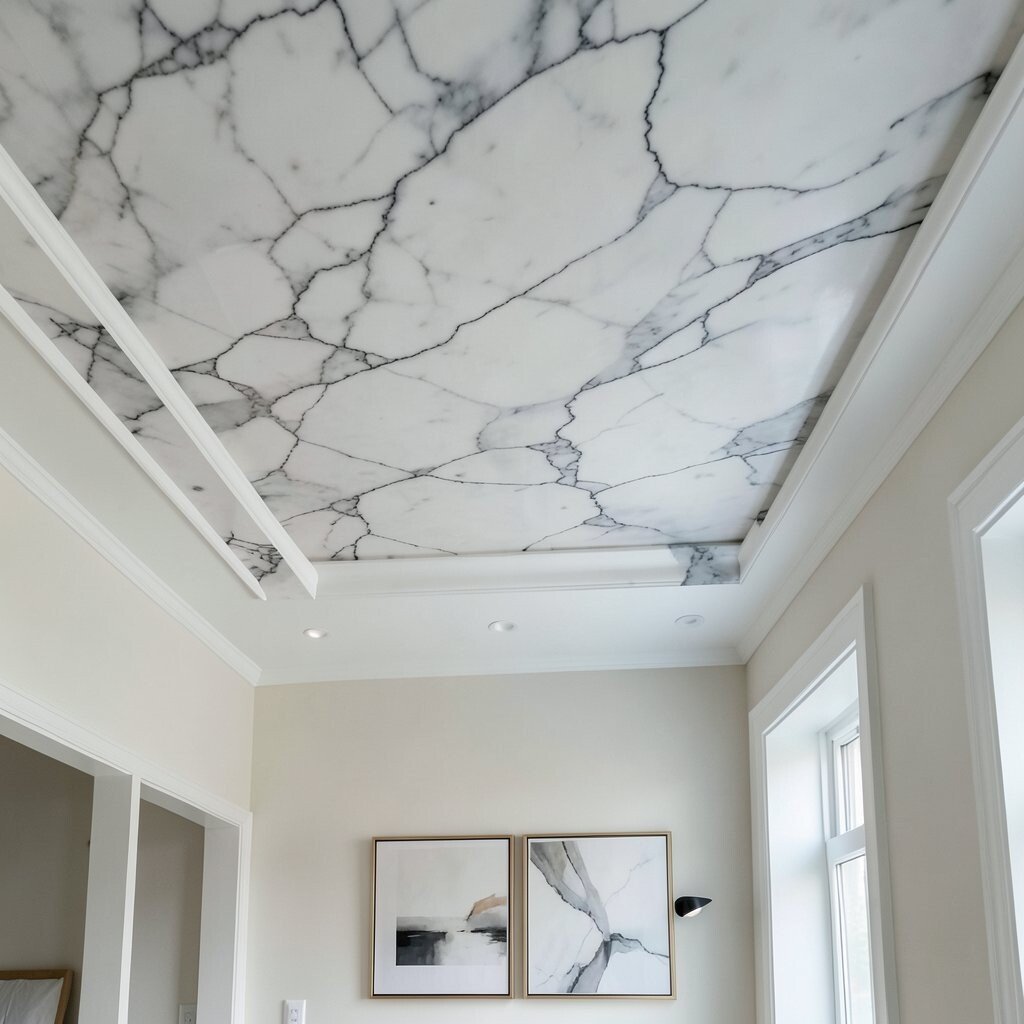
Imagine a ceiling that looks like soft stone, with gentle swirls and elegant contrast. It gives a high-end feel, even if you are working with basic materials.
Cover the floor and vents, then spray a base color and add darker veining with a marbling technique. Practice on cardboard first so you learn how the pattern falls. Seal the finish if the product suggests it so it stays clean longer.
This looks great right now because many rooms aim for “quiet luxury” without loud colors. Cost considerations are manageable since one kit can cover a large area when you work efficiently. For personalization, keep the palette neutral like warm white and taupe for calm sophistication, or go bolder with charcoal and cream for a dramatic look.
21. Simple Ceiling Air Vent Trim With a Decorative Ring
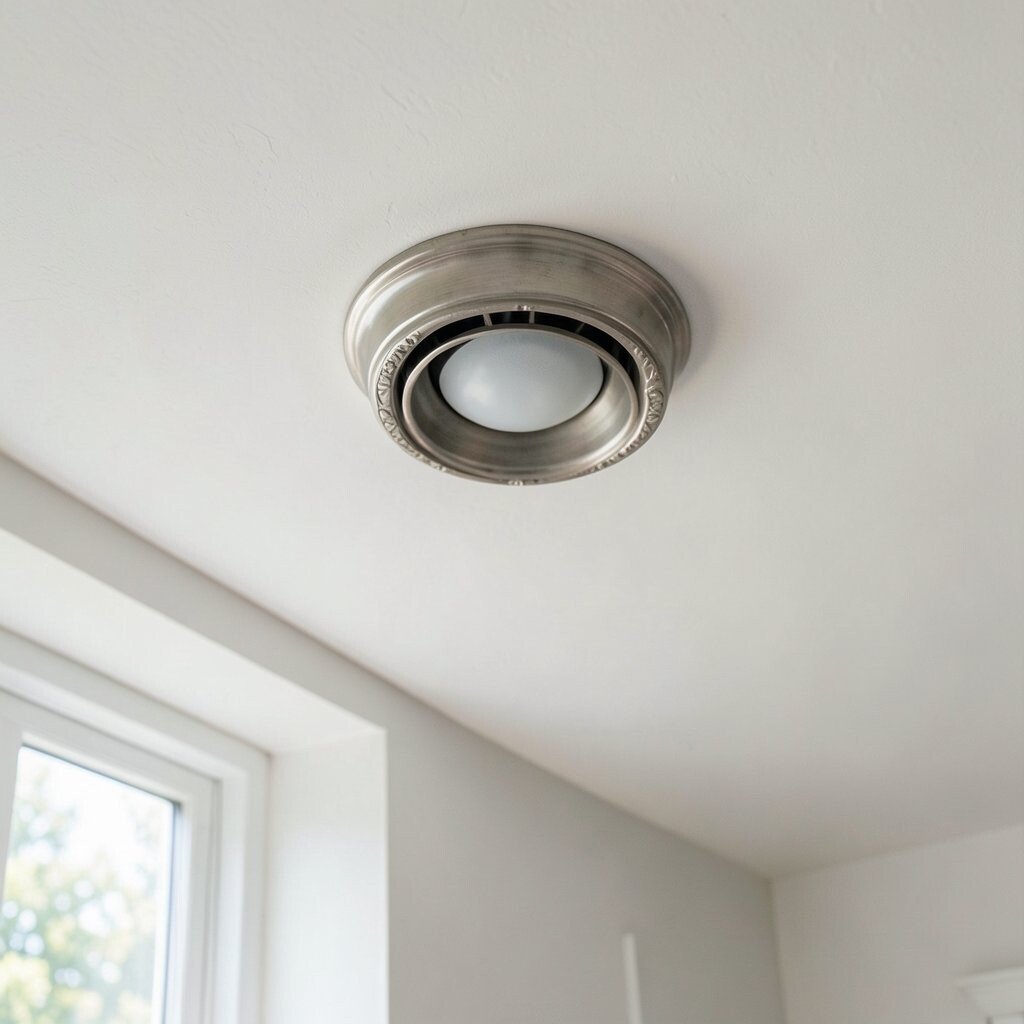
Imagine the vent area becoming a finished design detail instead of a plain box. A decorative trim ring can make the ceiling look more cared for instantly.
Choose a trim kit that fits your vent opening or use a compatible cover plate, then paint it to match the ceiling. Clean the area well so the adhesive holds, and tighten any screws gently if your kit includes them. This is a smart beginner project because it is small, fast, and forgiving.
It is also practical since keeping the vent area neat helps with visual clutter. If you want uniqueness, select a trim style with subtle texture or a small pattern that matches other decor details. For cost, you can usually find affordable vent covers, and you’ll get a noticeable upgrade without major materials.