A good craft moment can turn an ordinary day into a creative one. Once you start gathering simple supplies, your ideas begin to show up in your hands.
These DIY projects are meant to feel friendly and doable, even if you are new. Each idea includes practical steps, cost thoughts, and ways to make it truly yours.
Pick a pile of shirts you do not wear anymore and cut them into strips. You will watch the fabric turn into soft, stretchy “yarn” that feels amazing in your fingers.
Heat-pressed seams are not required, but smooth edges help your knots stay tidy. This project keeps usable fabric out of the landfill and gives your finished work a cozy, lived-in look. Try weaving it into a chunky coaster set or crocheting a quick plant holder.
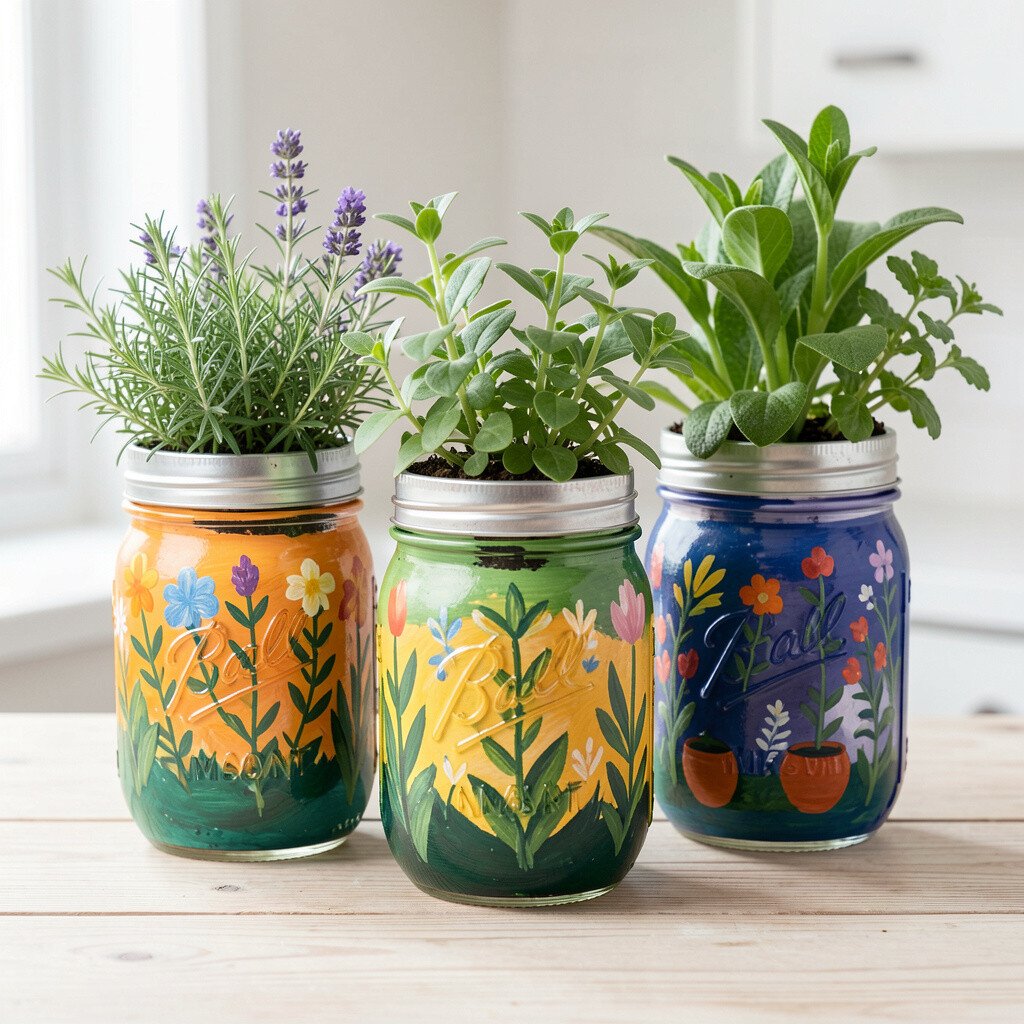
2. Mason Jar Herb Planters With Painted Patterns
Mason Jar Herb Planters With Painted Patterns
Grab a clean jar and paint simple shapes around it, like dots, stripes, or tiny leaves. The glass catches the color and makes a bright little window garden.
Start by checking that the lid can be reused or swapped for a better fit. Adding drainage holes protects roots, and using potting mix gives fast-start growth. For personalization, match the pattern to your room colors or make each jar a different plant label with small painted icons.
Cost stays low when you use jars you already have, plus basic acrylic paint and soil. If you enjoy current trends, matte paint and nature-inspired palettes look especially modern this year.
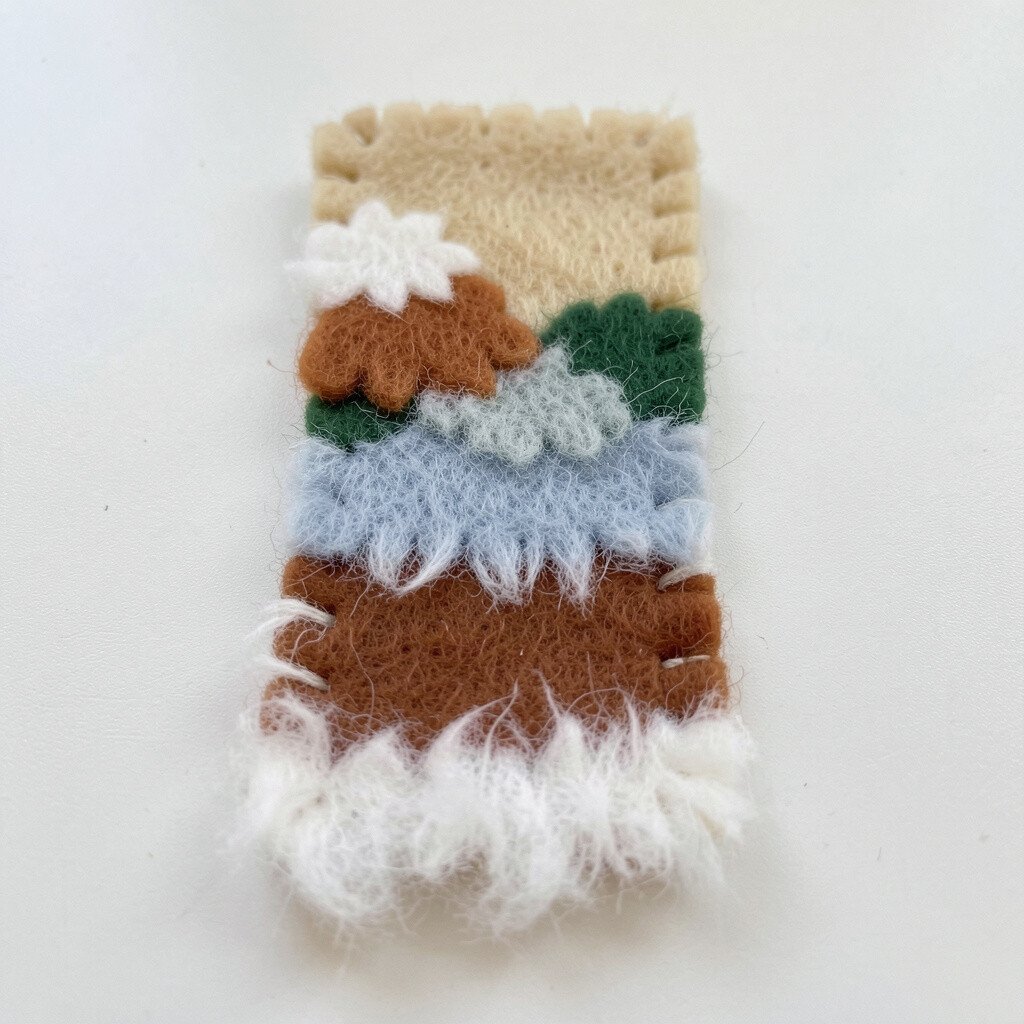
3. No-Sew Felt Bookmark With Fluffy Edges
No-Sew Felt Bookmark With Fluffy Edges
Choose felt scraps and cut a tall rectangle, then snip small notches along the side. When you run a fingertip over the edges, the texture feels warm and satisfying.
Use a glue stick or fabric glue to seal the sides, then add a layered shape on the front such as a heart, star, or tiny cat face. This craft is great for quick wins, and it keeps your books neat without any needles. For practical tips, press firmly for a full minute so the felt bonds stay strong.
Personalize by mixing colors based on your favorite genre, like calm blues for mystery or bright reds for romance. Felt usually costs less than specialty craft materials, especially if you buy small sheets and cut creatively.
If you want a trend touch, try a soft gradient look using two or three close shades and a slightly messy, handmade edge.
4. Scratch-Off Style Greeting Cards With Wax Resist
Scratch-Off Style Greeting Cards With Wax Resist
Paint a card surface with dark acrylic, then cover it lightly with wax crayon lines. When you scratch the top layer with a paper clip, the hidden colors begin to show like magic.
Use a blunt tool to avoid tearing the paper, and keep pressure gentle for clean details. This method gives a unique reveal moment, and it makes even simple messages feel special. Make personalization easy by writing names in small hidden patterns, like dots that form initials.
5. Embroidery Hoop Wall Art With Fabric Letters
Embroidery Hoop Wall Art With Fabric Letters
Pick a hoop size and stretch a piece of fabric over it, then decide on one simple word. The curved hoop frames your design and makes your room feel more thoughtful.
Try raw-edge applique using fabric glue or basic hand stitches, then add stitched outlines for a crisp finish. The benefit is clear: your text looks artistic without needing complicated shading. For practical tips, keep letters chunky and spaced so they are easy to read from across the room.
Personalization can be as simple as using your favorite color thread for each letter. This craft is also budget friendly because fabric scraps and an embroidery thread spool go a long way.
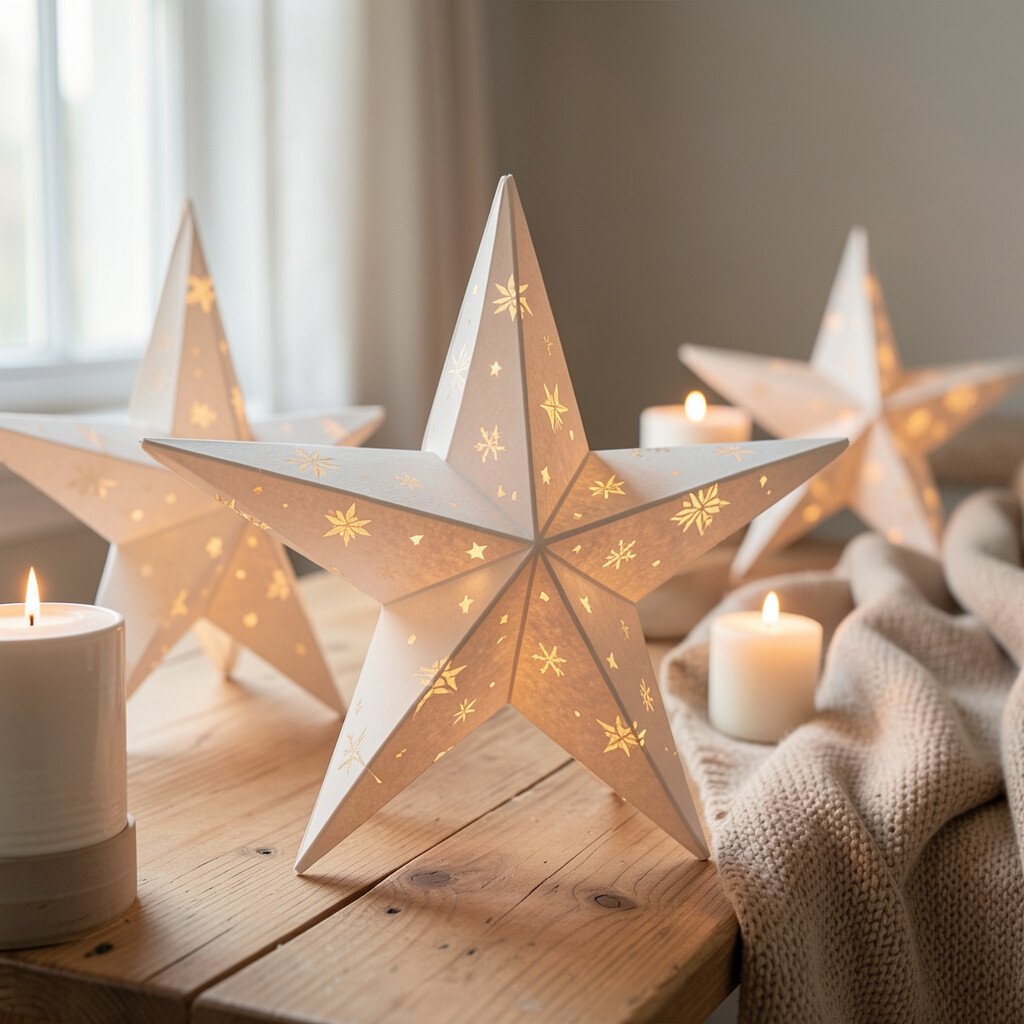
6. Paper Star Lanterns For Cozy Evenings
Paper Star Lanterns For Cozy Evenings
Fold and cut folded paper strips into star shapes, then layer them to form a lantern-like glow. When you hold one up, the edges create soft, geometric light.
Use thicker cardstock for sturdier folds, and tape the inside seams so they do not open. This is a fun way to brighten shelves or tables without buying store decorations. Make it unique by mixing pattern paper, like subtle florals or bold stripes, and try a color theme for each season.
Cost considerations are simple since paper lanterns rely mostly on paper and tape. Current trends lean toward warm, handmade lighting, and these stars fit that vibe nicely.
7. Salt-Dough Keepsake Ornaments With Texture Impressions
Salt-Dough Keepsake Ornaments With Texture Impressions
Mix flour, salt, and water until you can roll it smoothly, then press leaves, lace, or buttons into the surface. The raised patterns look like tiny sculptures.
Let them dry slowly and bake if you want a harder finish, because thicker pieces need more time. This project turns small memories into decor you can keep for years. For practical tips, write dates on the back with a toothpick before it fully dries.
Personalization is easy with color washes after baking, like gold flecks or pastel streaks. Salt dough often costs far less than pre-made ornaments, especially when you use pantry ingredients.
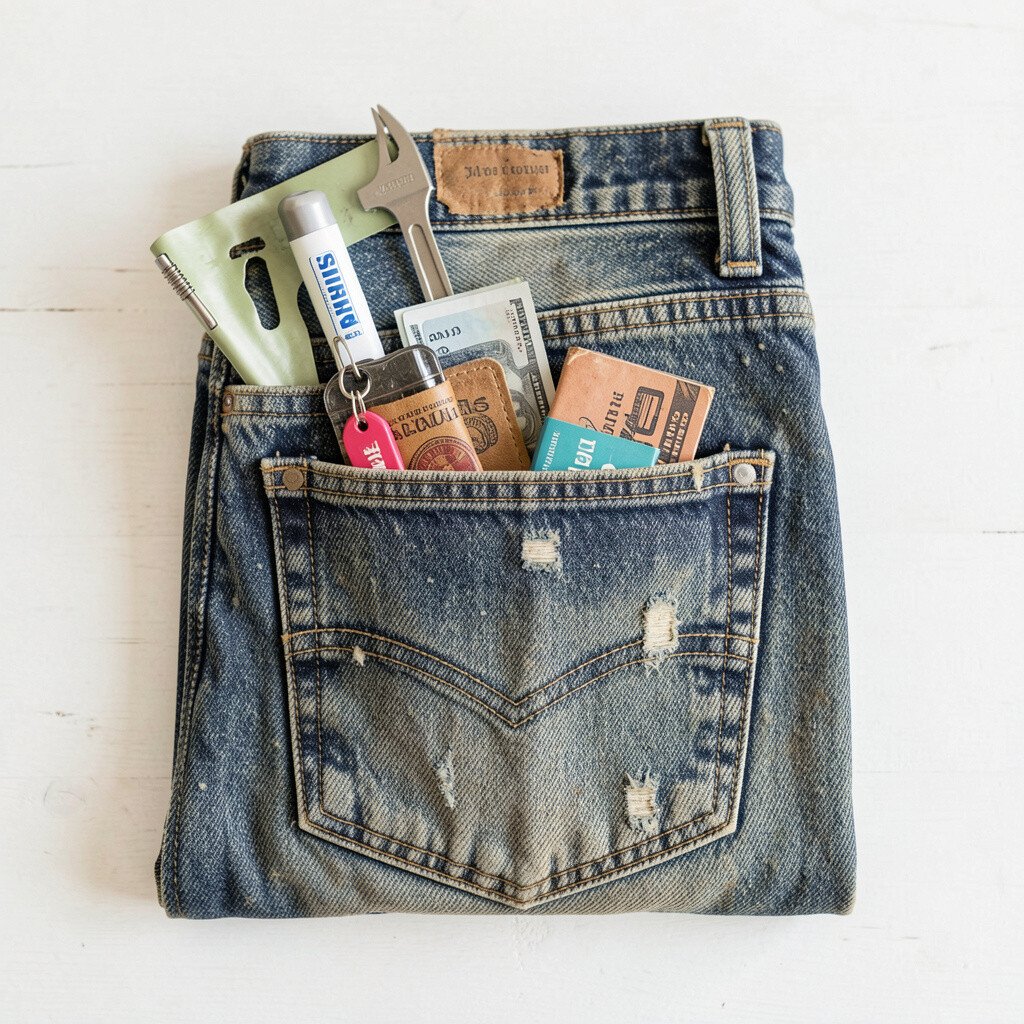
8. Old Jeans Pocket Catch-All Organizer
Old Jeans Pocket Catch-All Organizer
Cut a jeans leg and reuse the original pocket to make a wall or door organizer. The denim looks rugged and creates a strong visual texture.
Sew or stitch the pocket securely onto a backing panel so it holds keys and small items. This craft keeps your space tidy and adds personality without clutter. Personalization can come from adding patches, painting tiny symbols, or swapping to a different pocket layout.
Budget stays friendly because denim is durable, and you can work with scrap sizes. A current trend in home decor favors “workwear” style, and denim organizers fit right in.
For practical tips, reinforce the opening edge so it does not fray when you drop everyday stuff in.
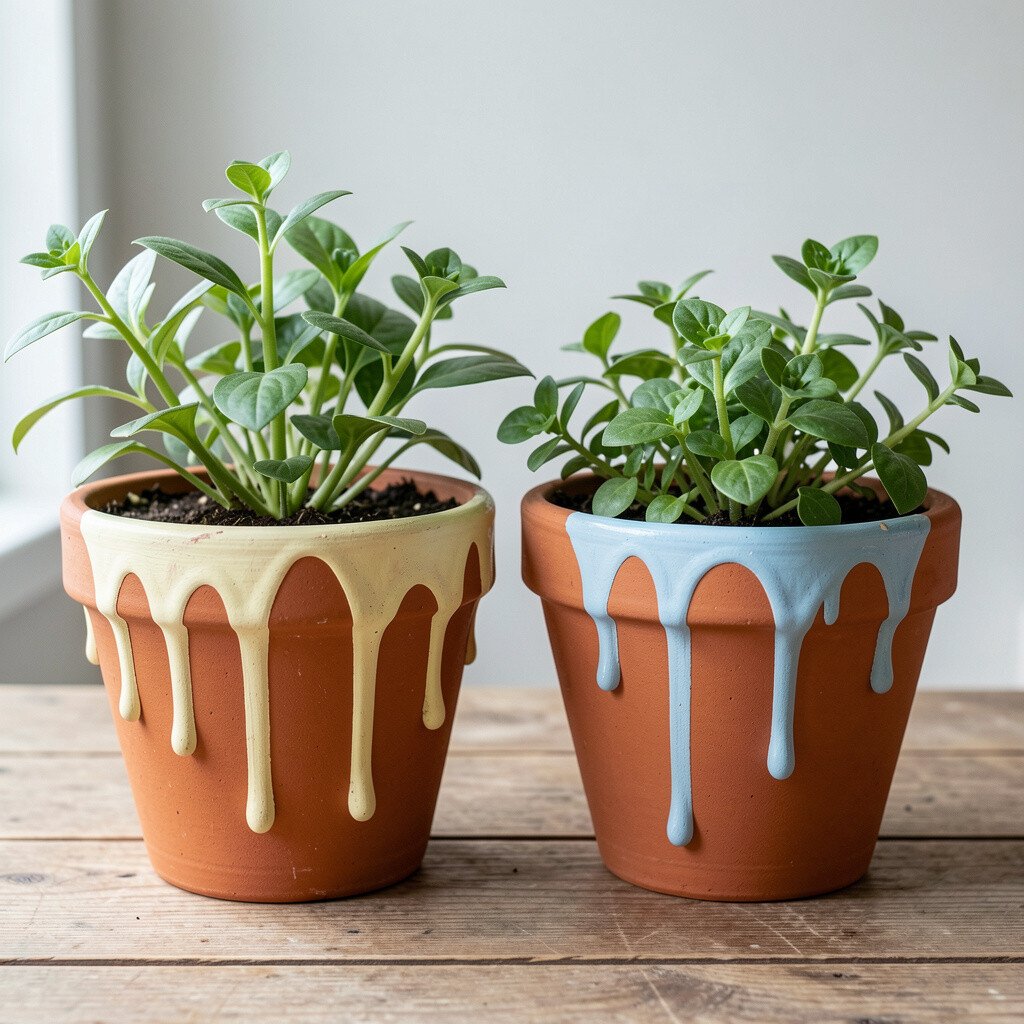
9. Painted Terracotta Planters With Drip Techniques
Painted Terracotta Planters With Drip Techniques
Pick terra cotta planters and paint them with thin coats, then tilt the cup so paint drips down. The runny lines make a playful, modern look even with simple colors.
Use painter’s tape to keep your top rim neat, and let each layer dry before adding the next. This project benefits your plants too since you are giving the pot a fresh look while keeping it sturdy. Personalization can follow your style, from soft neutrals to bright summer tones.
Consider cost carefully by using acrylic paint that you already own or by buying a small set of colors. Drip painting is popular in craft circles right now, and it pairs well with minimalist or maximalist rooms.
10. Folded Map Coordinates Canvas For Travel Feelings
Folded Map Coordinates Canvas For Travel Feelings
Choose a map book page or print your own map section, then fold it into a small layered shape. The creases create lines that look like gentle topography.
Mount the folded piece onto a canvas or thick paper, and add a simple coordinate or short date in pencil. This project is unique because your “location art” becomes personal, not generic. Practical tips include sealing the paper lightly with a matte clear spray so it stays flat.
For personalization, add tiny hand-drawn icons like a plane, wave, or coffee cup near the coordinates. Cost considerations are easy since many people already have maps, ink, and scrap canvas pieces at home.
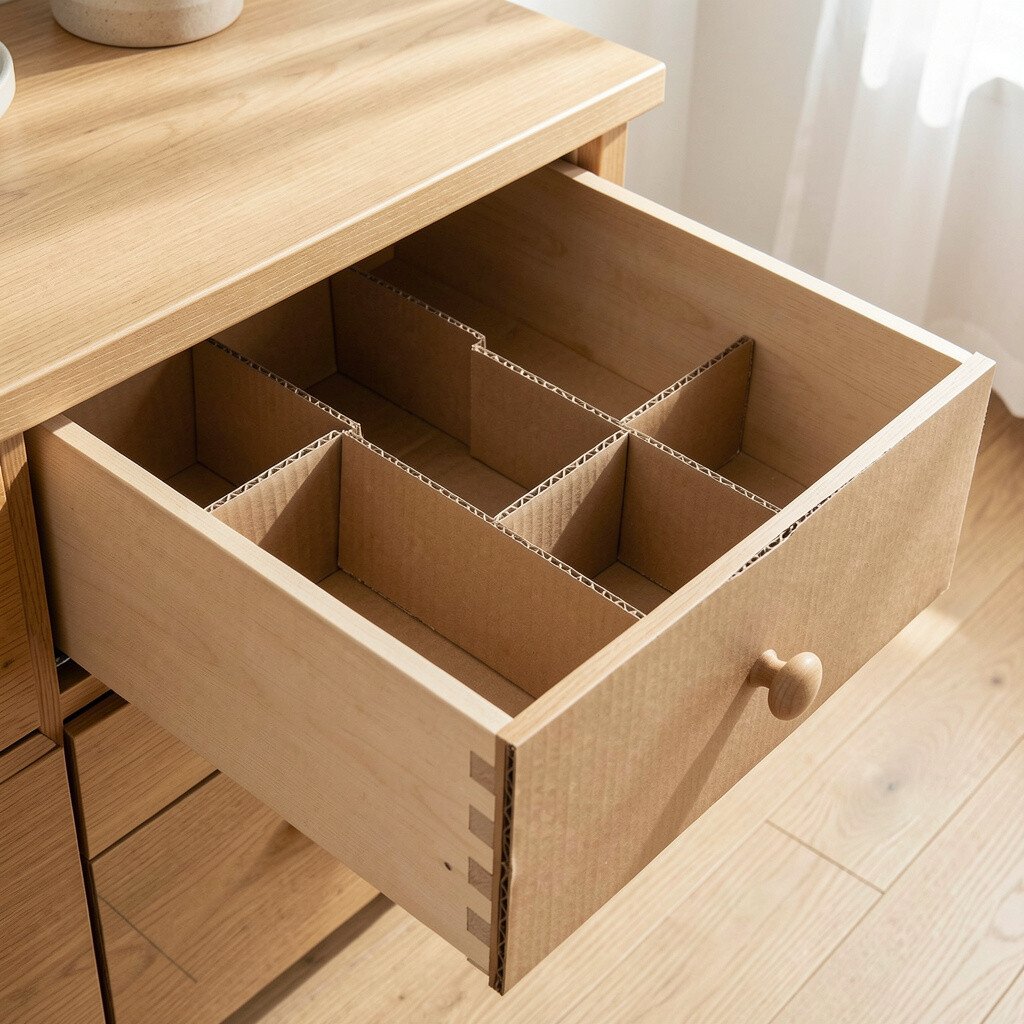
11. Upcycled Cardboard Drawer Inserts For Calm Storage
Upcycled Cardboard Drawer Inserts For Calm Storage
Measure your drawer and cut cardboard to fit, then cover it with patterned paper or fabric. You will love how it makes a messy drawer look intentional.
Use a craft knife carefully and keep edges smooth so items slide in easily. This benefits daily life because you can find things faster and reduce clutter stress. Personalization can be as simple as adding color blocks for each category, like pens, chargers, or craft tools.
Cost stays low because cardboard is free or cheap, and covering materials can be scrap-based. A current trend in organizing is “visible system” design, where everything looks neat because it has a dedicated spot.
12. Simple Beaded Bookmark With Character Corners
Simple Beaded Bookmark With Character Corners
String a few beads onto strong thread and attach them to a fabric ribbon or thin cord. The bookmark sparkles as you flip pages, even if it is small.
To keep it practical, use knotting or a secure bead stopper so the beads do not slide. This project benefits reading habits by making your books feel cared for. Make it unique by choosing beads that match your mood, like ocean blues for calm stories or neon colors for fun adventures.
Personalization ideas include adding one tiny charm that represents your favorite hobby. Cost considerations can be flexible since you can start with a small bead mix and a short ribbon length.
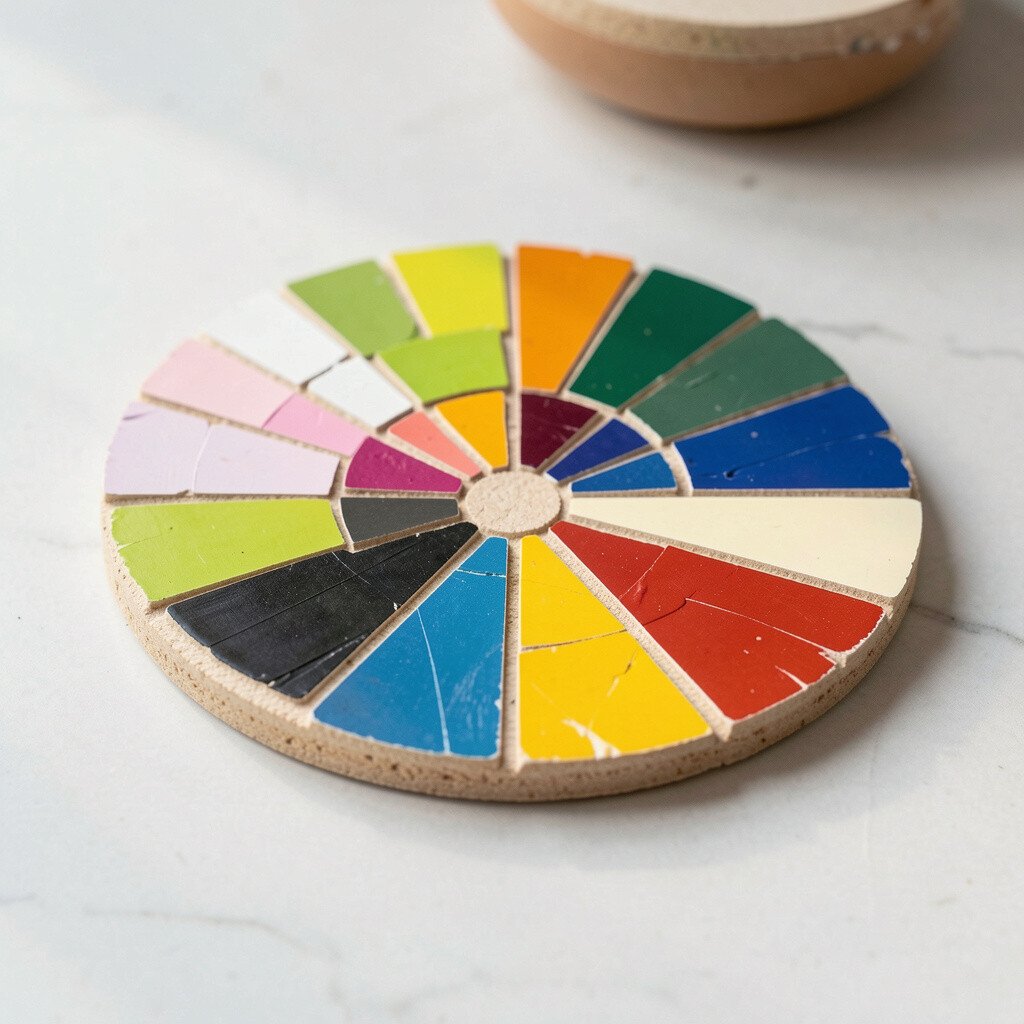
13. Paint Chip Color Wheel Coasters
Paint Chip Color Wheel Coasters
Collect old paint chips and cut them into circles that fit under glasses. When you glue and seal them, they become charming coasters with a tidy pattern.
Apply a clear protective layer so drinks do not stain the paper. This craft is great for color lovers because it turns a boring hardware bin find into home decor. Personalization is easy, too, since you can choose complementary shades or build a bold rainbow look.
Cost considerations are great if you can get free paint chips, and sealant is usually affordable. Current trends favor colorful accents, and these coasters look lively while still feeling handmade.
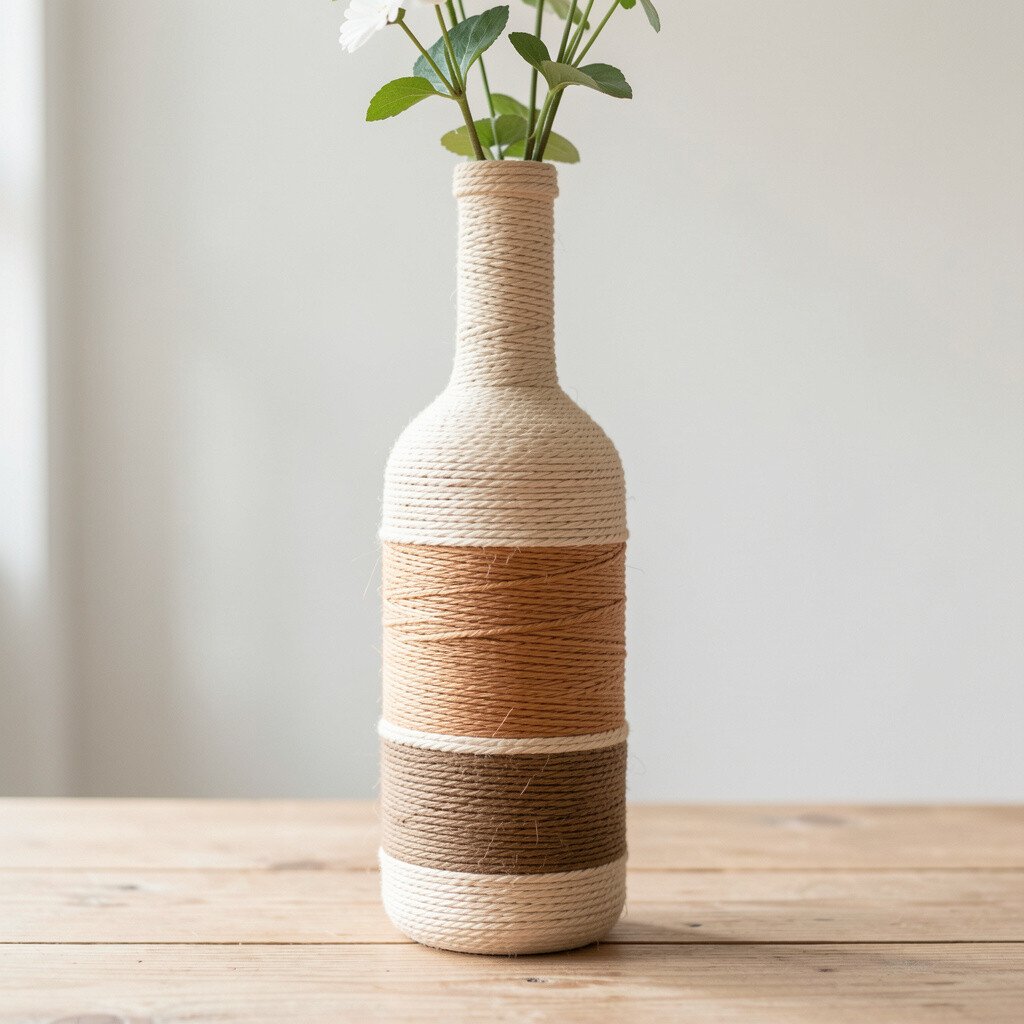
14. Thread Wrapped Bottle Vase With Texture Layers
Thread Wrapped Bottle Vase With Texture Layers
Remove labels from a glass or plastic bottle, then wrap it in yarn or twine using glue as you go. Each layer adds texture, and the bottle starts looking like a designer vase.
Use small sections of glue so it does not dry before the wrap sticks. This project benefits your space because it turns a plain bottle into a reusable centerpiece. For practical tips, keep tension even so the surface looks smooth and tidy.
Personalization can match your season by switching to burlap, soft pastel yarn, or shiny metallic thread. Cost considerations depend on how much thread you need, but yarn scraps often work perfectly.
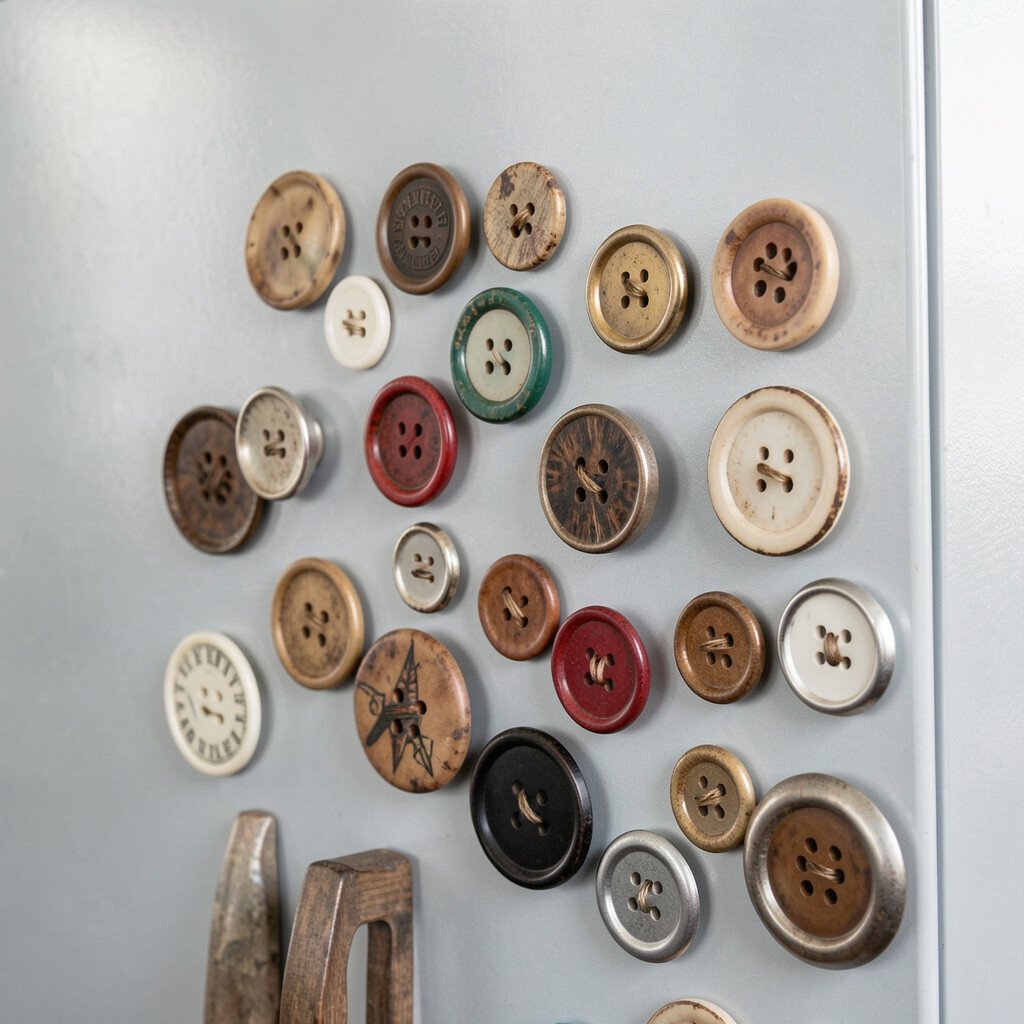
15. Vintage Button Magnets For Your Fridge
Vintage Button Magnets For Your Fridge
Hot-glue buttons onto small magnets or attach them to a backing pad for a flat, sturdy finish. The mix of sizes and colors creates a cute “collected” look.
This craft benefits your kitchen because it adds charm while holding notes and grocery lists. Make it unique by pairing buttons with different themes, like tiny flower shapes or ocean-toned colors. For practical tips, test weight first so the magnet holds without wobble.
Personalization ideas include adding letter buttons for family initials or themed sets like “summer” and “school.” Cost considerations stay low since button jars are often cheap or free from thrift stores.
If you want current trend energy, try a curated color palette rather than random assortments for a more styled appearance.
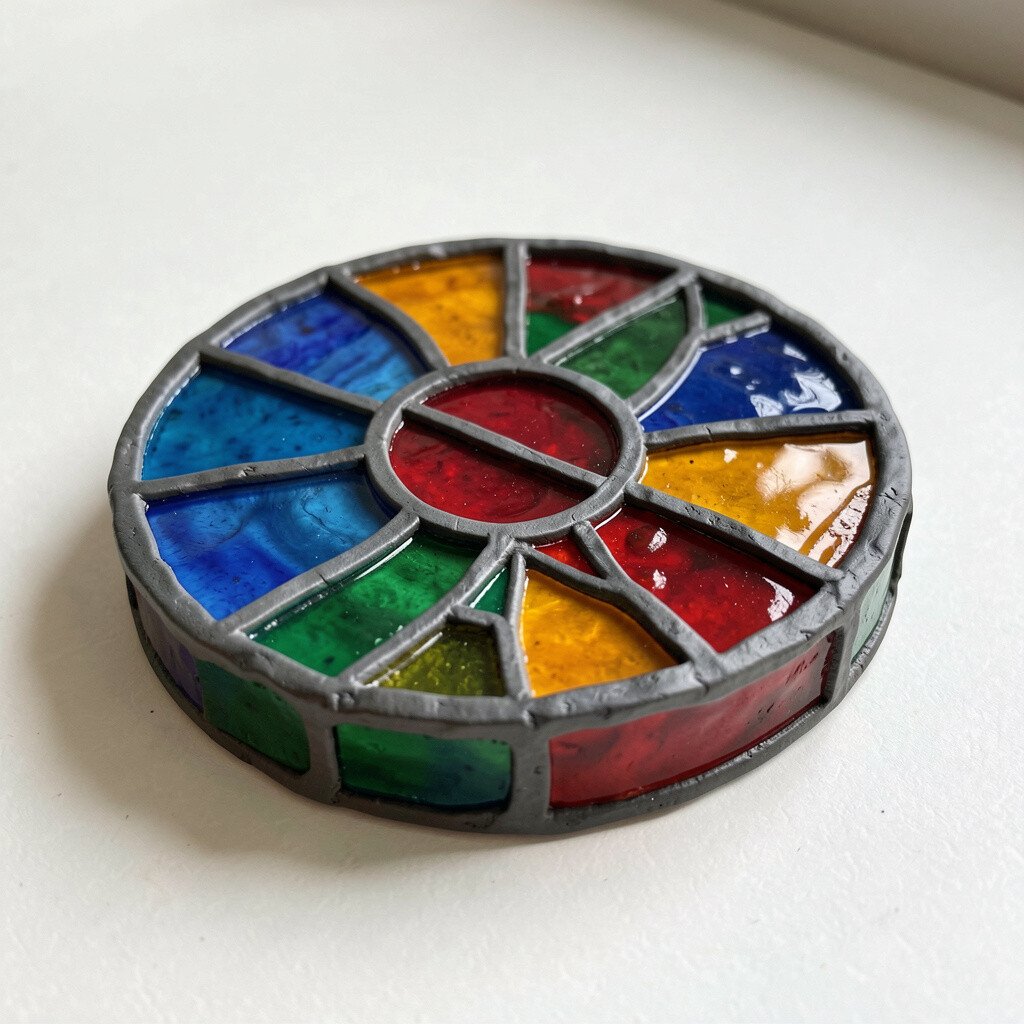
16. Clay Coating “Stained Glass” Coasters Using Acrylic Pour
Clay Coating “Stained Glass” Coasters Using Acrylic Pour
Use a silicone mold or thick cardstock base, then pour colored acrylic paint mixed with a pouring medium to create stained-glass swirls. The glossy surface looks like layered light.
After it cures, you can add a thin border with contrasting paint to frame each piece. This craft benefits you by making functional decor that is also visually striking. Personalization is easy with color themes like fall amber tones or cool winter blues.
Cost considerations include buying a small bottle of medium, but you can still use mostly acrylic paint from your stash. If you are into current trends, glossy pours and color-drenched art remain popular, and these coasters fit that look.
For practical tips, work on a protected surface and keep pours level so patterns do not slide.
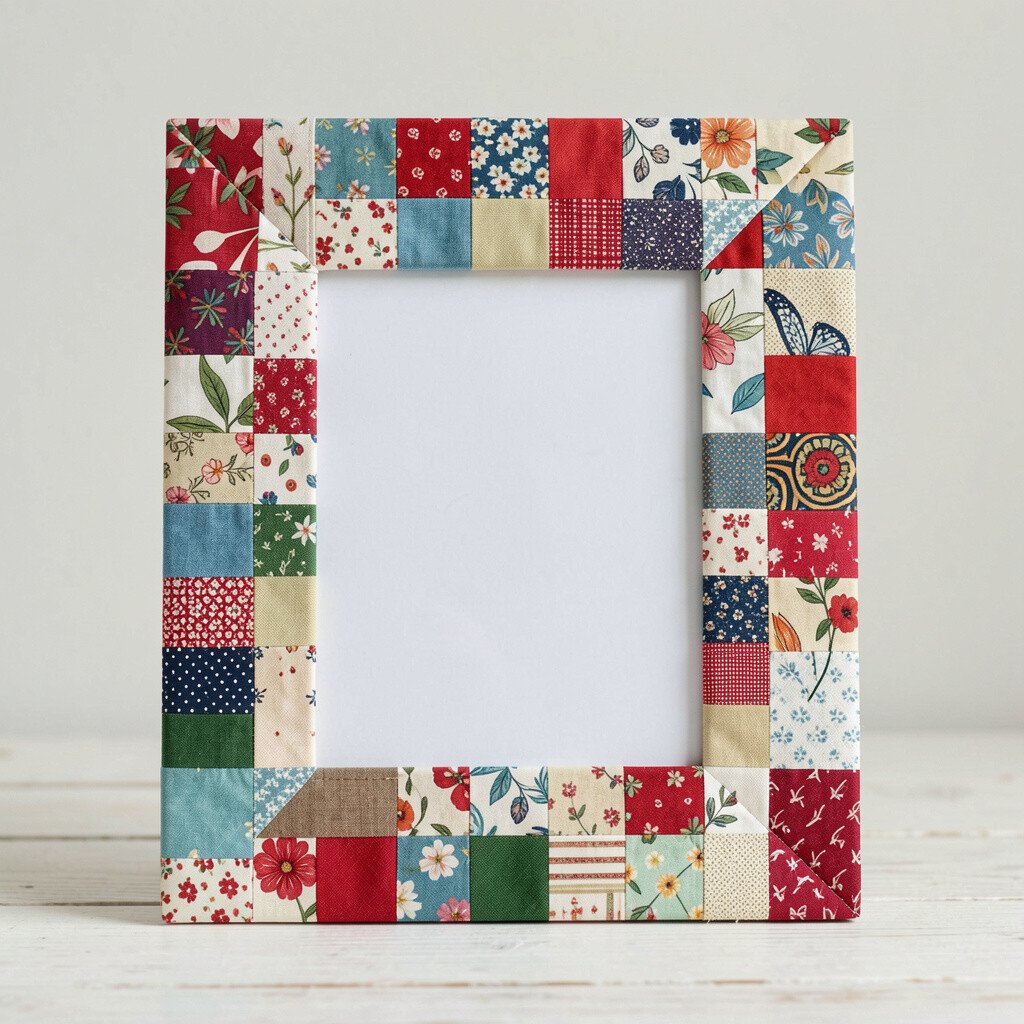
17. Fabric Scrap Patchwork Photo Frame
Fabric Scrap Patchwork Photo Frame
Cover a simple frame with fabric scraps arranged in a patchwork grid. The visible stitches and mixed patterns make your photo feel wrapped in comfort.
Use fusible adhesive or fabric glue to secure scraps, then add a small trim strip for a clean edge. This benefits your decor by adding warmth and making your favorite memory stand out. Personalization can follow your story, like using old shirt fabric from a family event.
Cost considerations are usually low if you start with a thrifted frame and scrap fabric. A current trend in craft rooms is “memory materials,” and repurposed clothing fits perfectly.
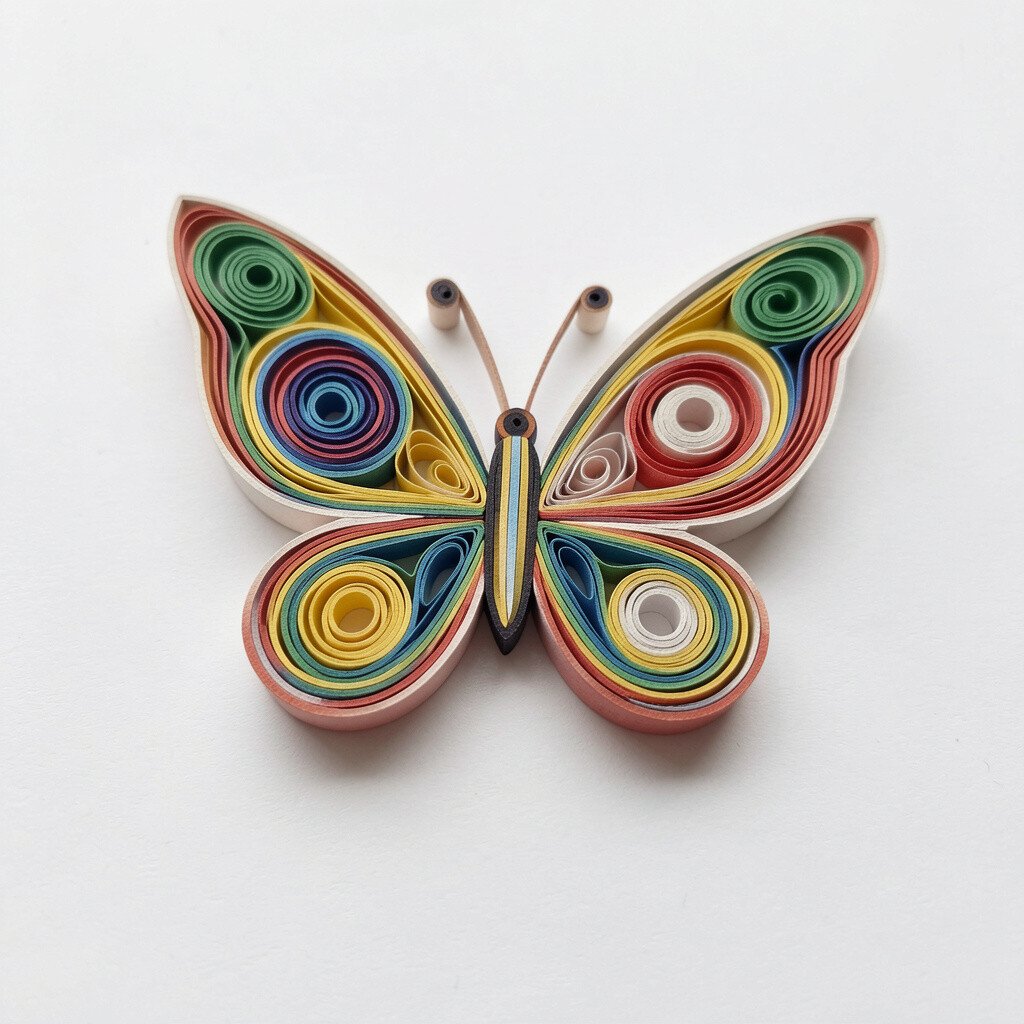
18. DIY Paper Quilling Butterflies With Simple Strips
DIY Paper Quilling Butterflies With Simple Strips
Cut or buy quilling strips, then roll them into shapes for butterfly wings. When you arrange them on cardstock, they look delicate and bright.
Use a quilling tool or toothpick to keep rolls tight, and glue the ends carefully. This project benefits your focus because it is calming and repetitive. Personalization is fun since each butterfly can have its own pattern by mixing strip colors and wing sizes.
Cost stays reasonable because strips are small and a starter kit can last a long time. Current trends lean toward nature motifs, and butterflies add that light, airy feeling to cards and wall art.
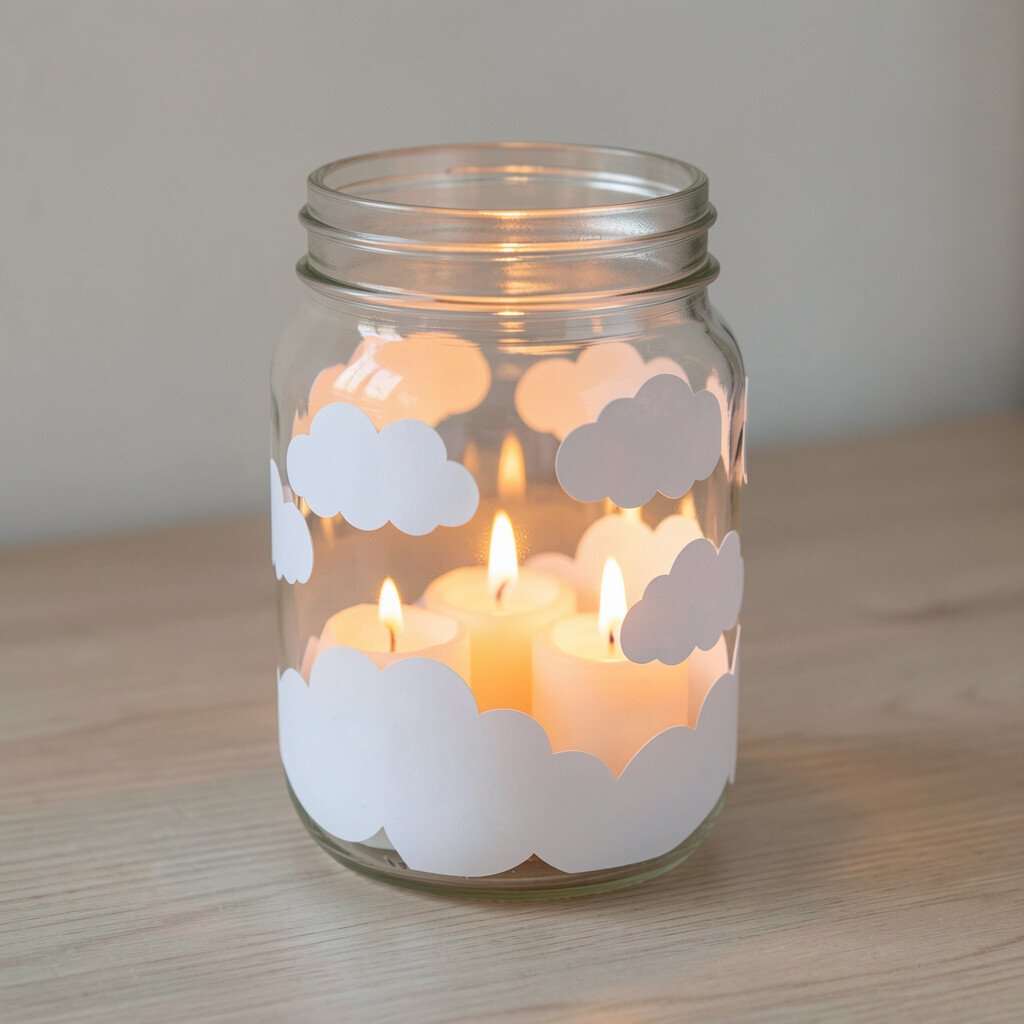
19. Glow Jar Nightlight With Led Candles And Paper Clouds
Glow Jar Nightlight With Led Candles And Paper Clouds
Create a jar nightlight by placing an LED candle inside and layering paper cutouts around it. Soft cloud shapes make the light feel gentle and dreamy.
Use transparent tape or glue dots to hold cutouts, and keep materials away from the LED to stay safe. This craft benefits bedtime routines by turning gloomy corners into cozy spaces. Personalization ideas include using star stickers, tiny moon phases, or color gradients that match your bedroom.
Cost considerations are manageable because LED candles are often reusable and paper is cheap. If you follow current trends, soft night lighting and “storybook” aesthetics are still everywhere.
For practical tips, test the jar opening fit so the candle sits centered and does not wobble.
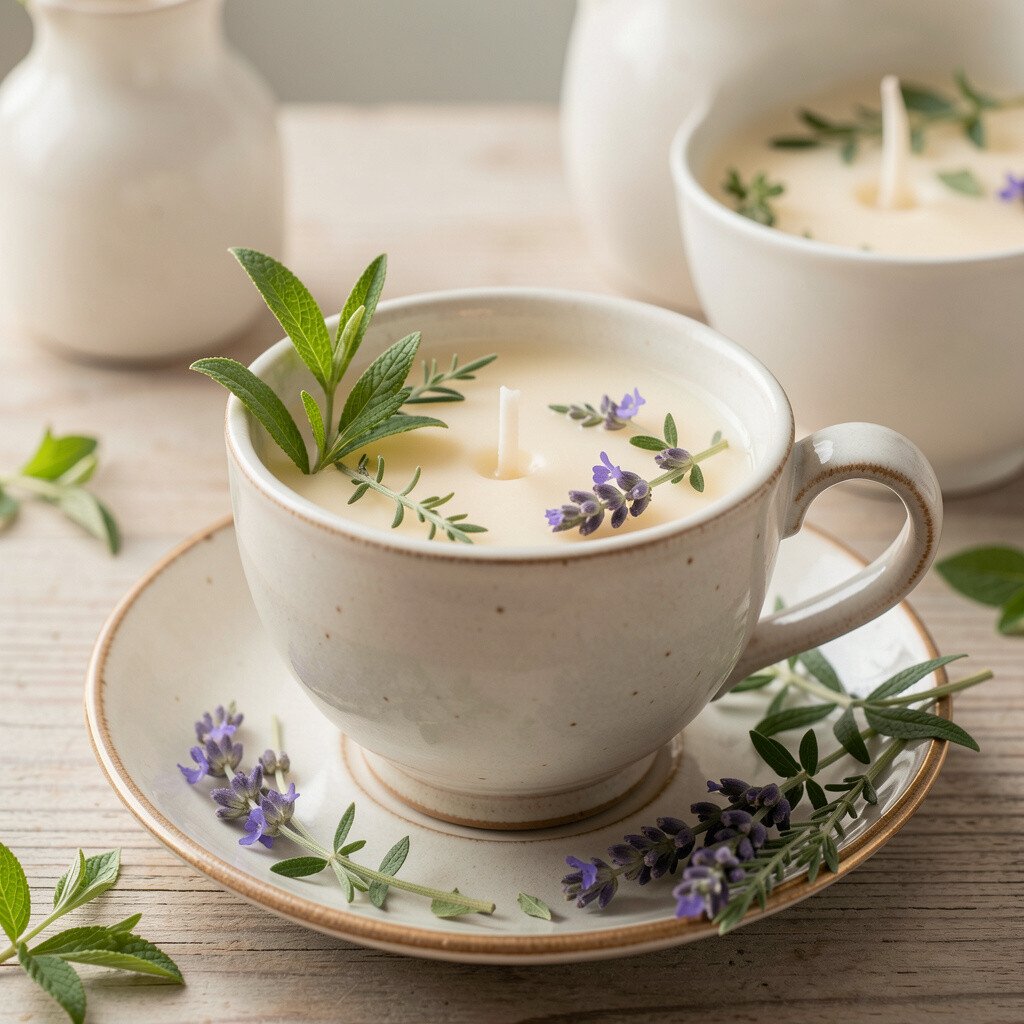
20. Homemade Soy Candle In Teacup Containers With Herbs
Homemade Soy Candle In Teacup Containers With Herbs
Pour melted soy wax into a teacup mold and add dried herbs or flower petals for a subtle look. The cup becomes part of the decoration, not just a container.
Use a wick sized for your pour depth, and keep fragrance minimal if you plan to burn it near sensitive noses. This craft benefits your home because it creates a warm mood and reduces waste when you reuse teacups. Personalization can be as simple as choosing rose petals, lavender, or citrus peel flakes based on your favorite scent profile.
Cost considerations depend on wax and wick, but soy wax often comes in small starter options. Current trends support cozy sensory decor, and teacup candles feel special without being too flashy.
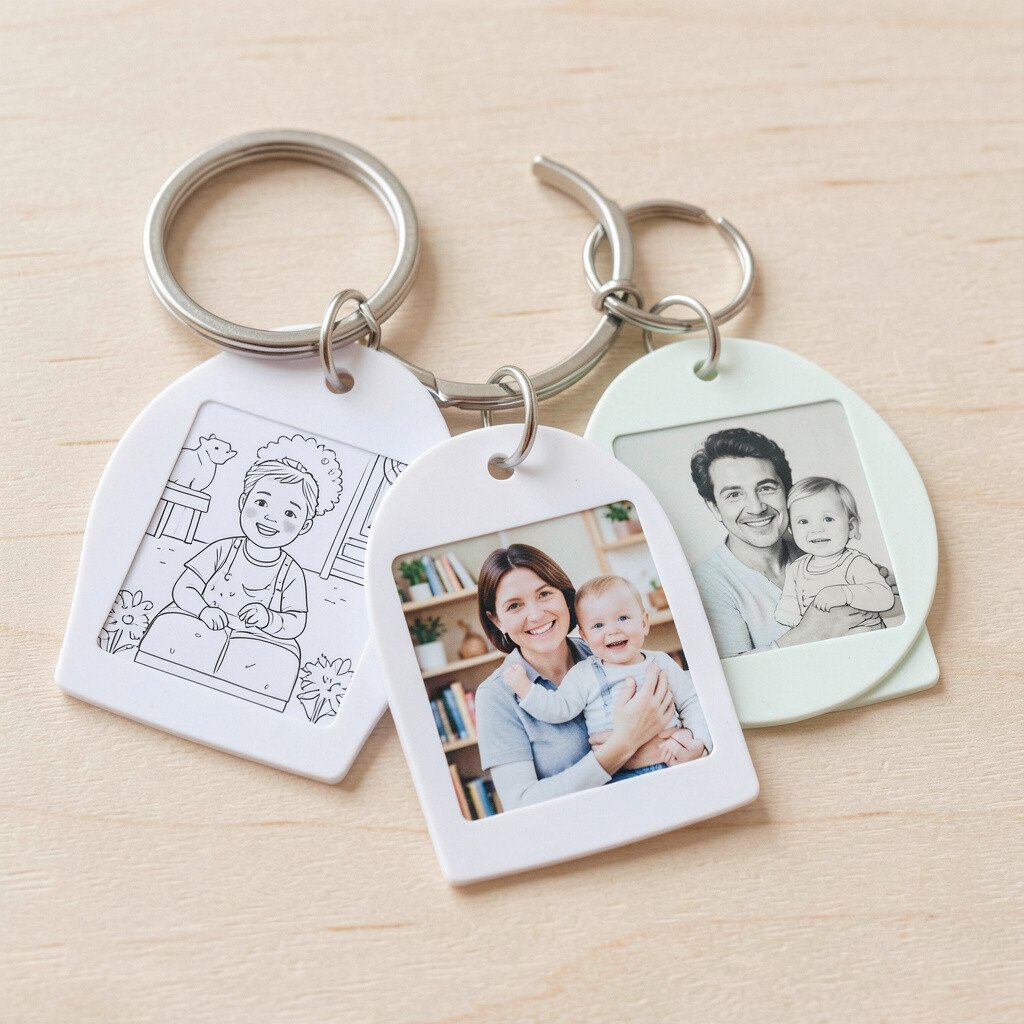
21. DIY Shrink Plastic Keychains With Photo Tracing
DIY Shrink Plastic Keychains With Photo Tracing
Trace a small photo or drawing onto shrink plastic, then cut it out and heat it until it shrinks. Watching the details tighten up feels like a tiny art transformation you can actually hold.
Use a hole punch before shrinking and choose smooth, simple outlines so nothing breaks. This benefits you by turning digital pictures and sketches into physical keepsakes. Personalization ideas include adding names, dates, or mini symbols that match your interests.
Cost considerations are friendly because a sheet of shrink plastic lasts for many keychains. If you like current trends, custom character charms and photo-based designs are very popular in handmade accessories.
For practical tips, practice with scrap first so your cutting size stays consistent and the final keychain sits flat.